


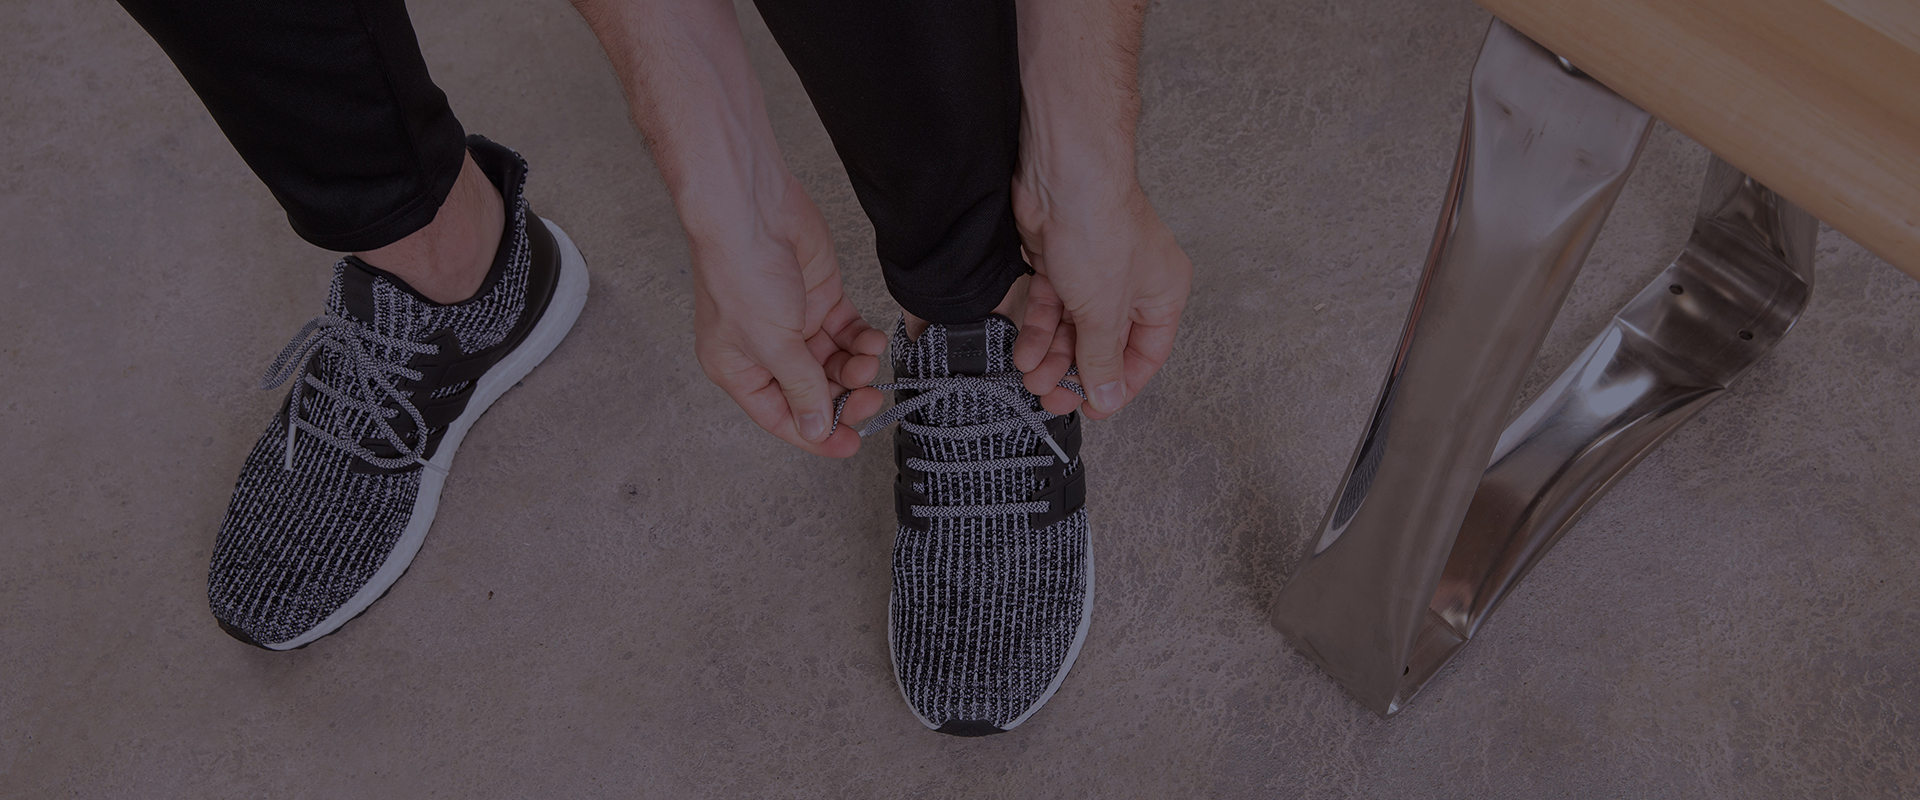
Before finding your stride, it’s important to know how to lace your running shoes specific to your gait and foot width. This step is especially valuable in lowering your risk of injury, not to mention chafing and blistering.
There are many methods but these six are the most common: Lydiard lacing, gap lacing, wide foot, narrow foot, diagonal lacing and runner’s loop (also known as heel-lock lacing). Each style offers a different level of support and comfort, so test them out and find what’s best for your foot.
In the end, this is how your running shoes should fit and feel 1) snug in the heel and midfoot with a little bit of wiggle room in the toes 2) when holding the shoe’s heel and raising your foot, there should be little to no movement 3) top eyelets on each side of the tongue should be parallel 4) tight fit that still offers comfort for reduced impact and increased stability.
LACING INSTRUCTIONS
When you’re learning how to lace running shoes, follow these steps:

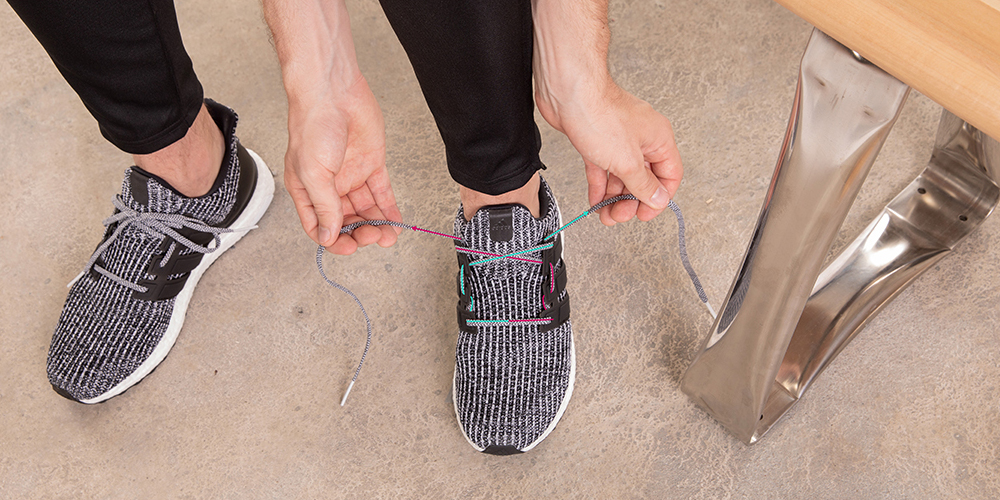
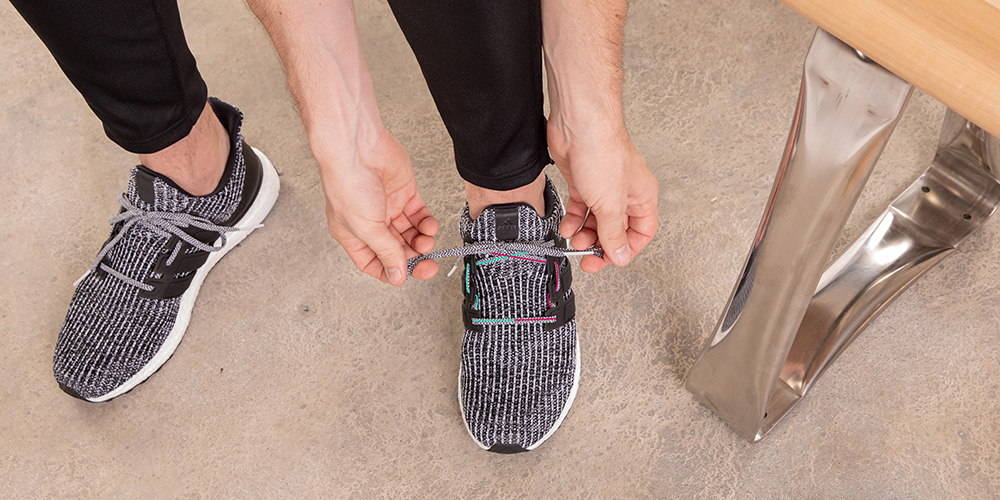
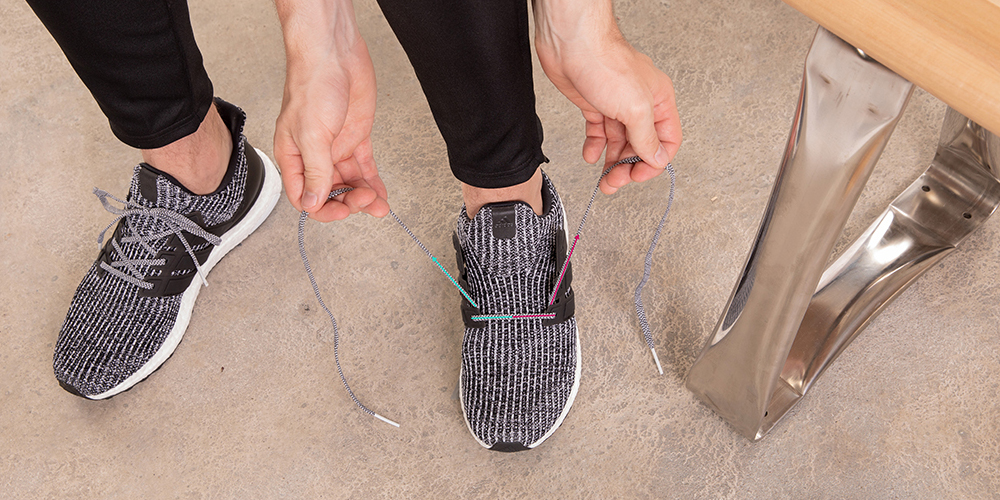
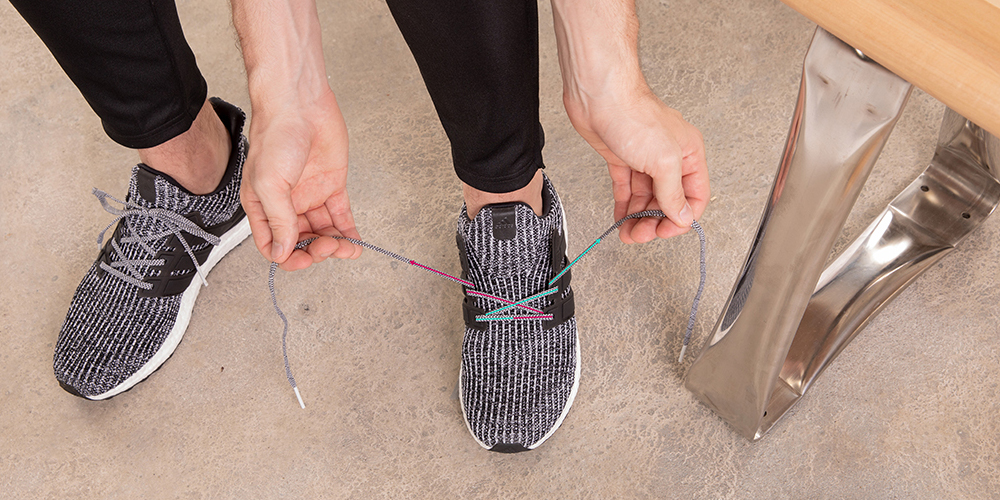
LYDIARD LACING
Developed specifically to increase blood circulation to distance runners’ feet by relieving pressure. A helpful style if your shoes feel tight or binding.
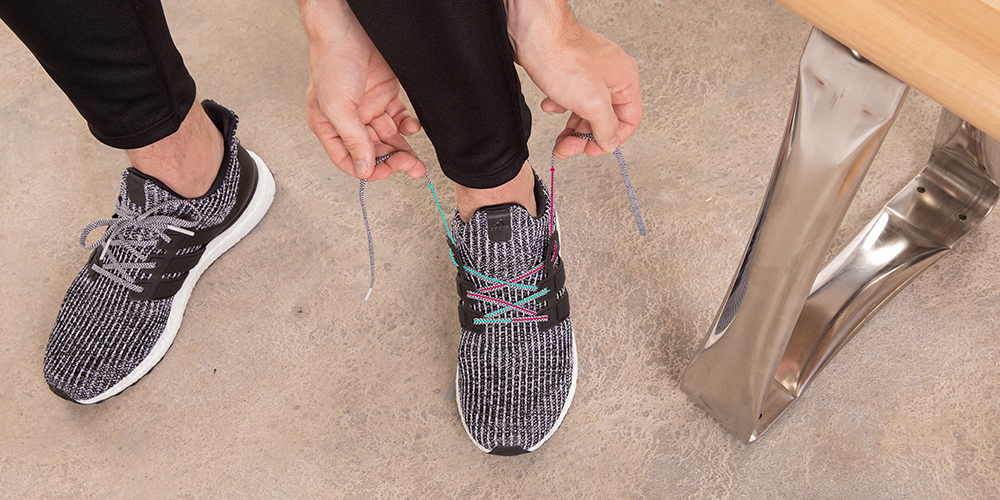
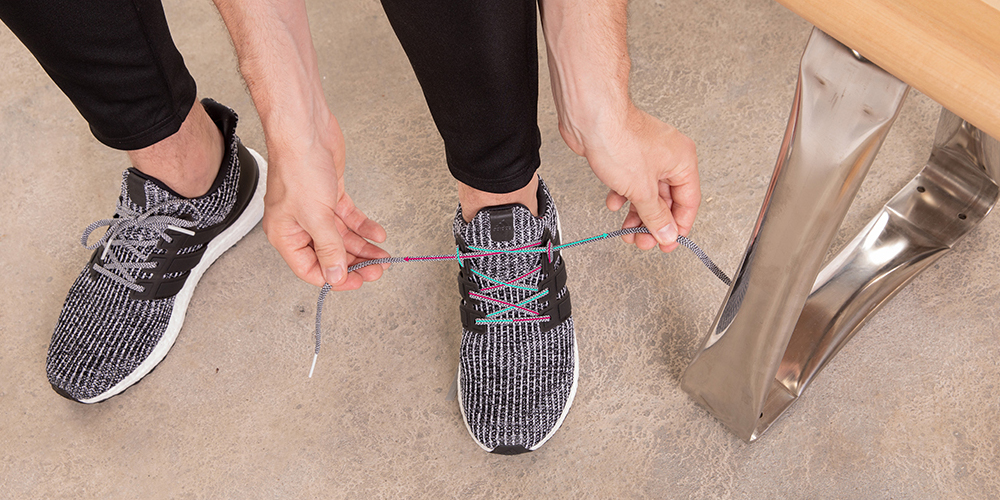
lace running shoes

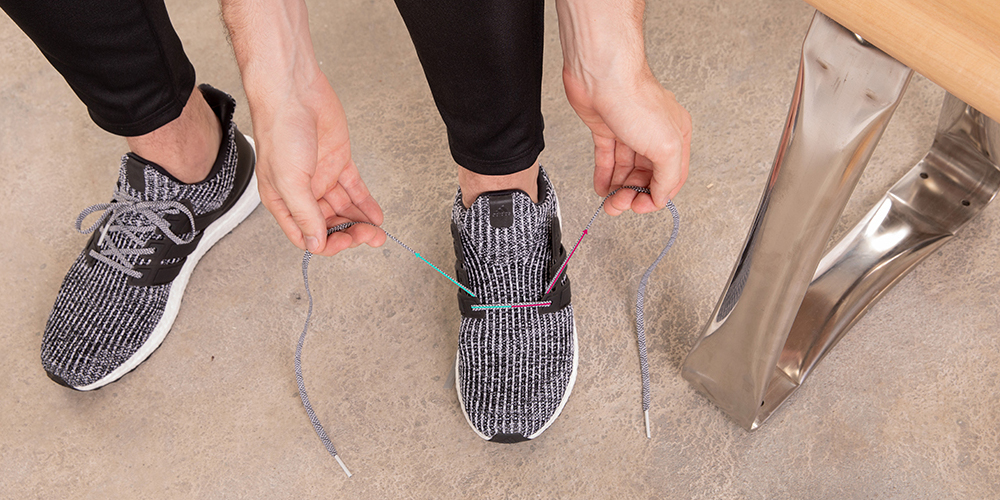
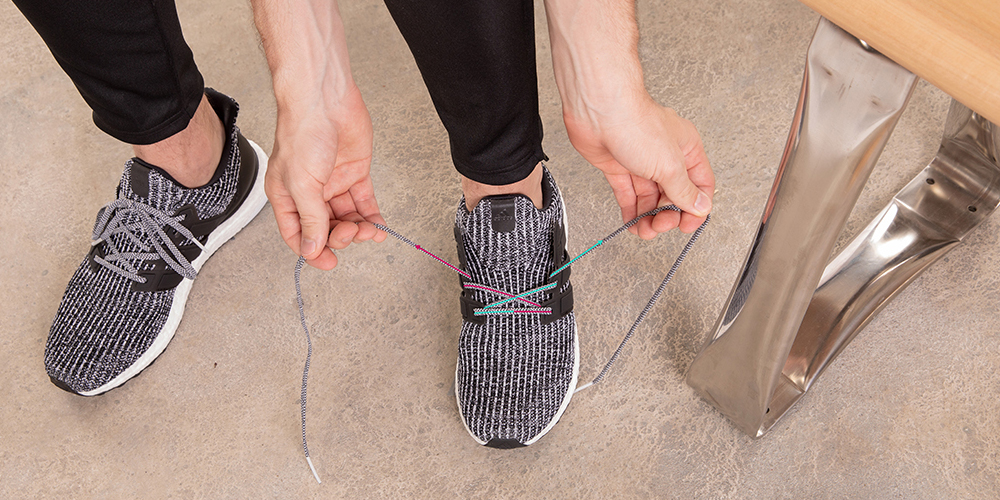
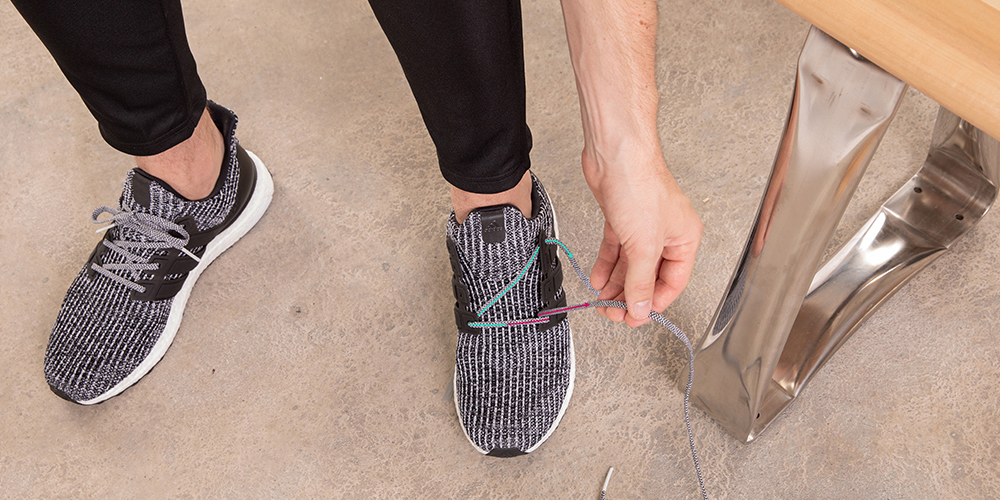
Step #1
Start by threading the lace through the bottom eyelets until there is an equal amount of lace on either side of the shoe.

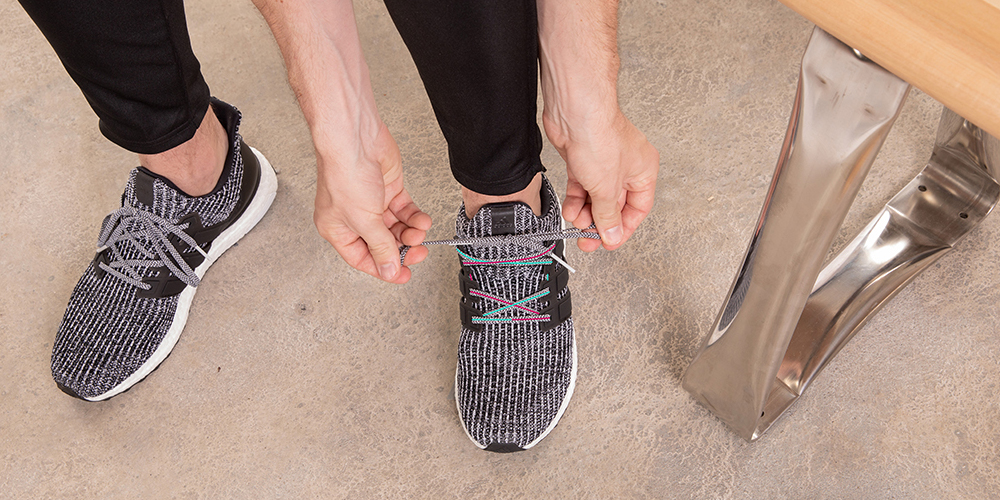
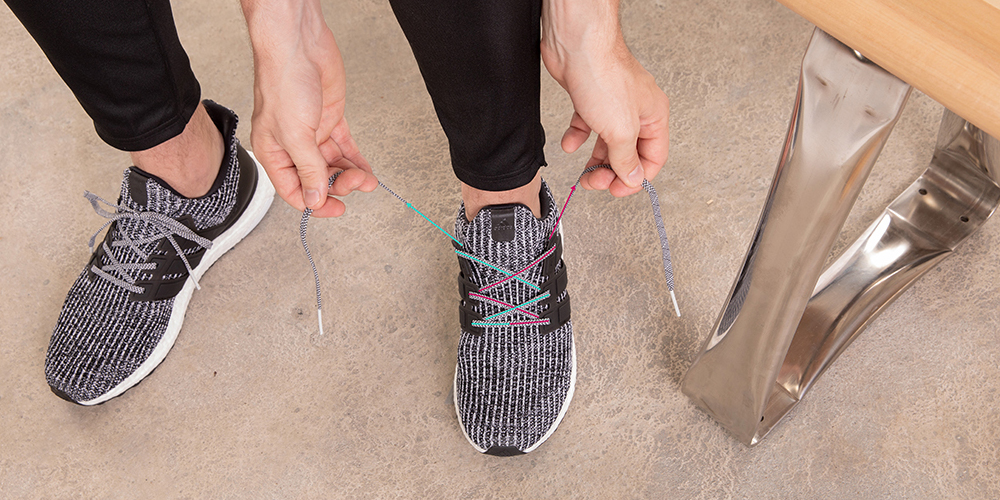
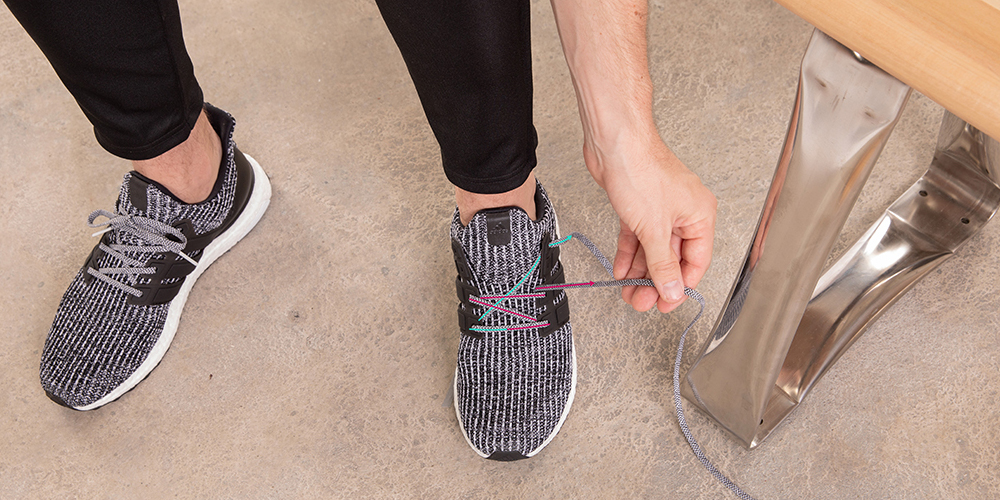
Step #2
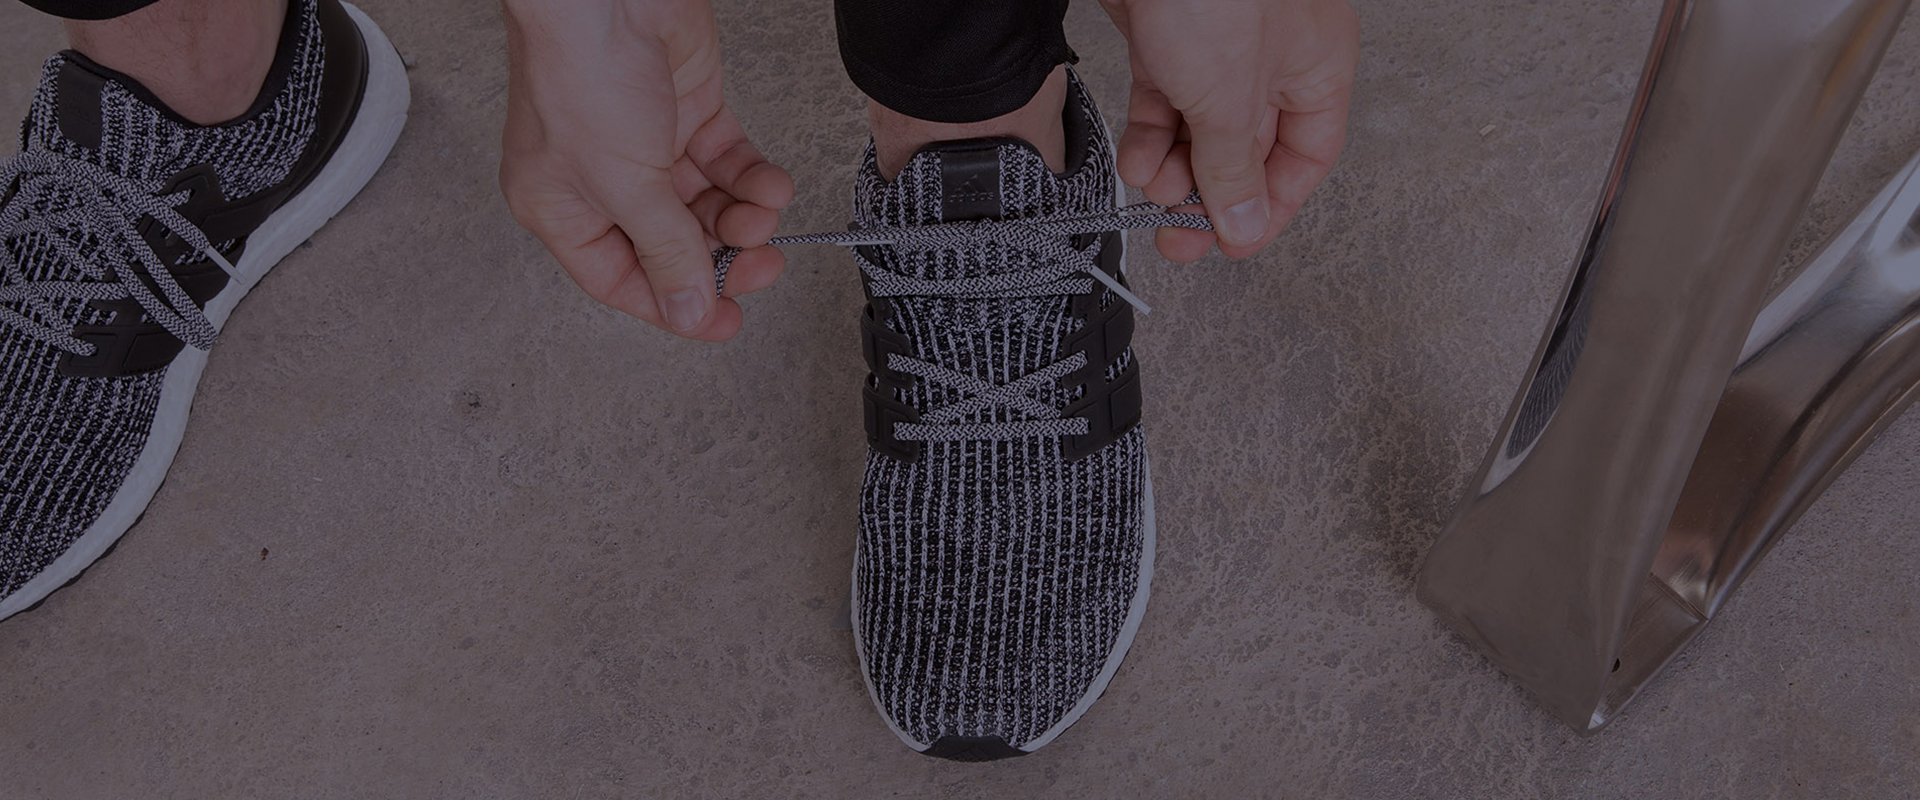
Run the left lace straight-up the inside of your shoe to the second eyelet, then lace straight across.

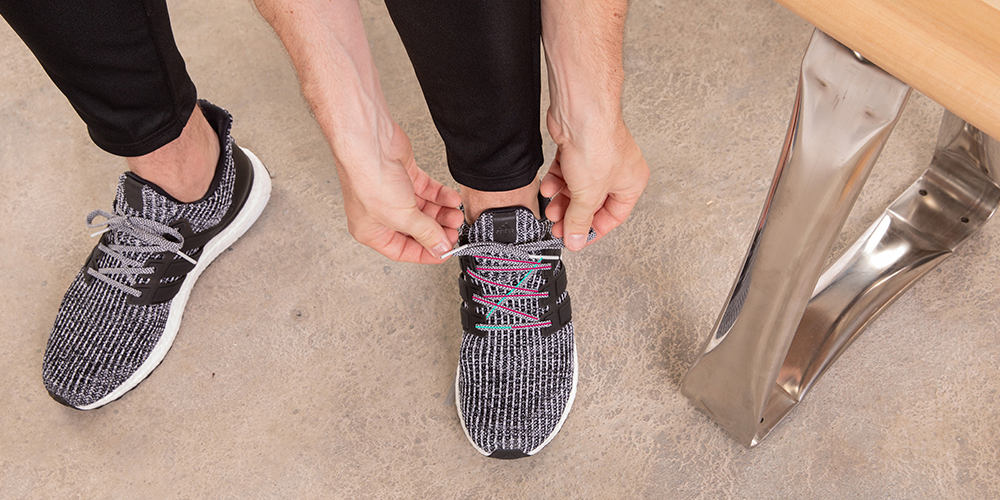
Step #3
Run the right lace straight-up the inside of your shoe to the third eyelet, then lace across.

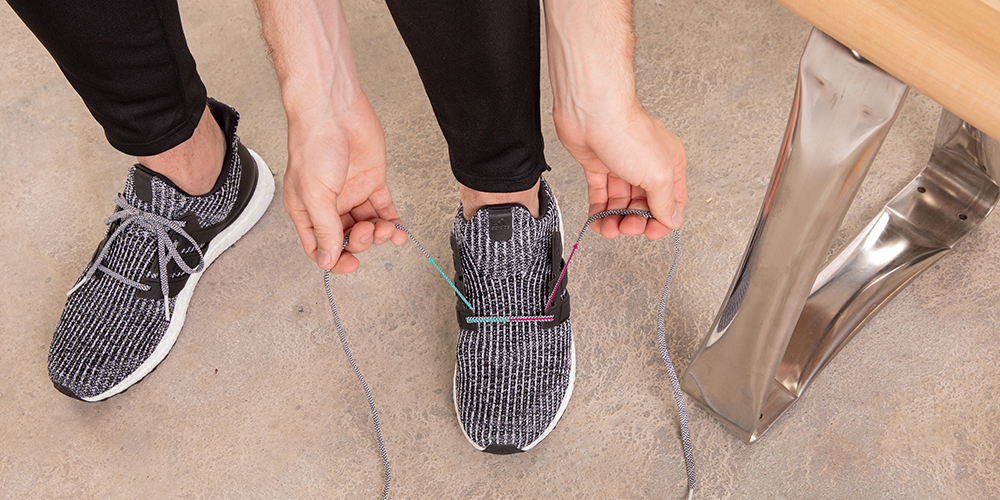
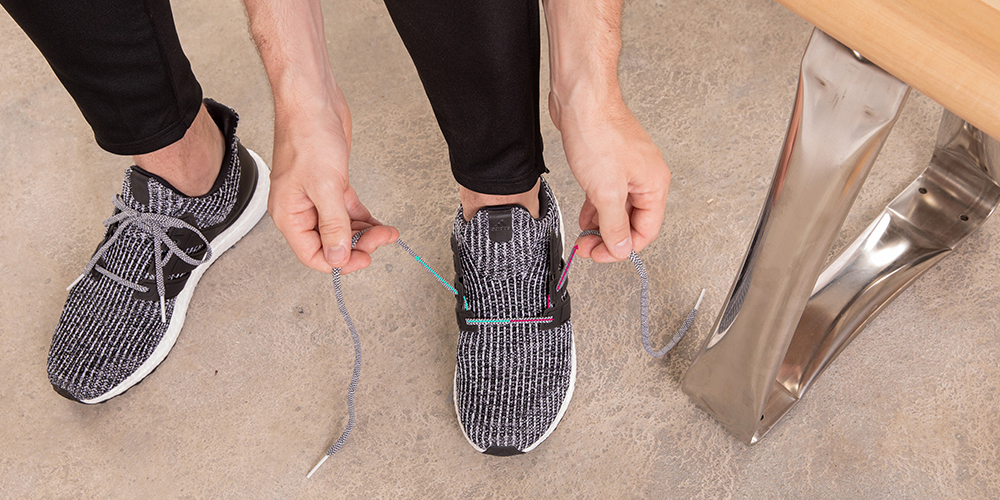
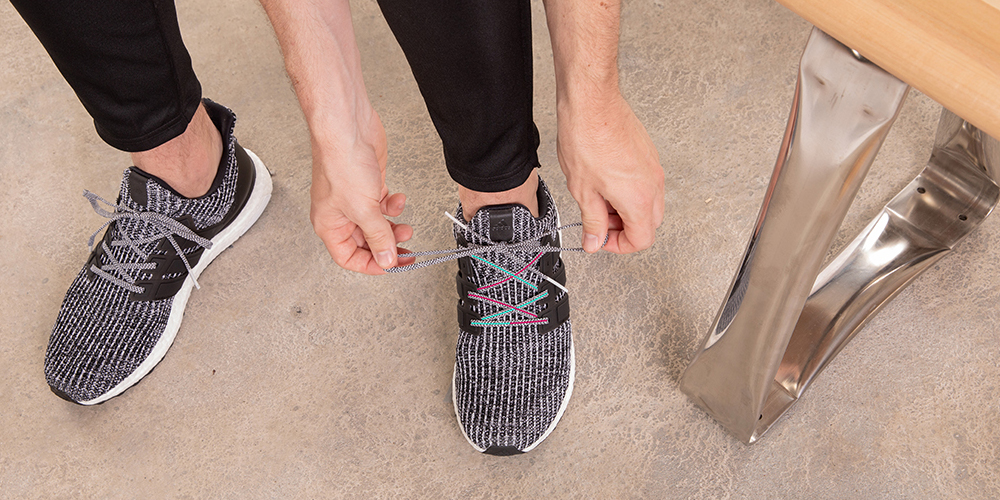
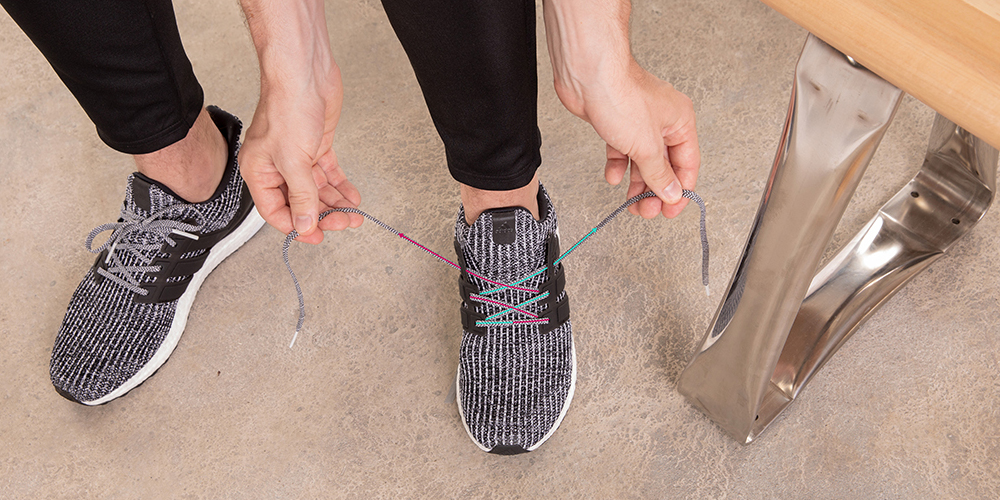
Step #4
Continue this pattern of skipping eyelets and running the laces up through the inside of the shoe and straight across through the adjacent eyelet until complete. Finish with standard bow tie.
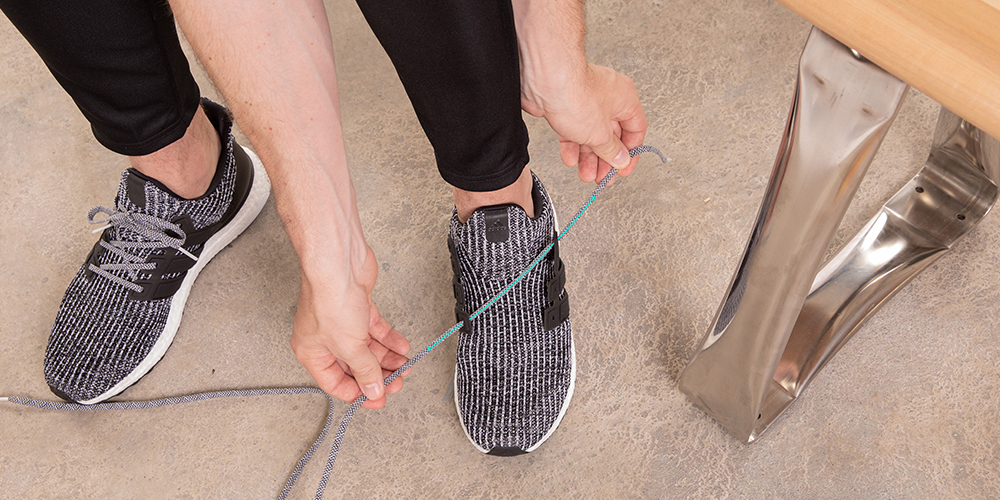
GAP LACING
This style is named for the “gap” in the middle of the shoe which accommodates high arches. It also increases ankle flexibility for trail runners or could be used to avoid a sensitive area. Note: The gap should be positioned wherever needed but the steps below outline directions for a high arch gap in the middle of the foot.
lace running shoes
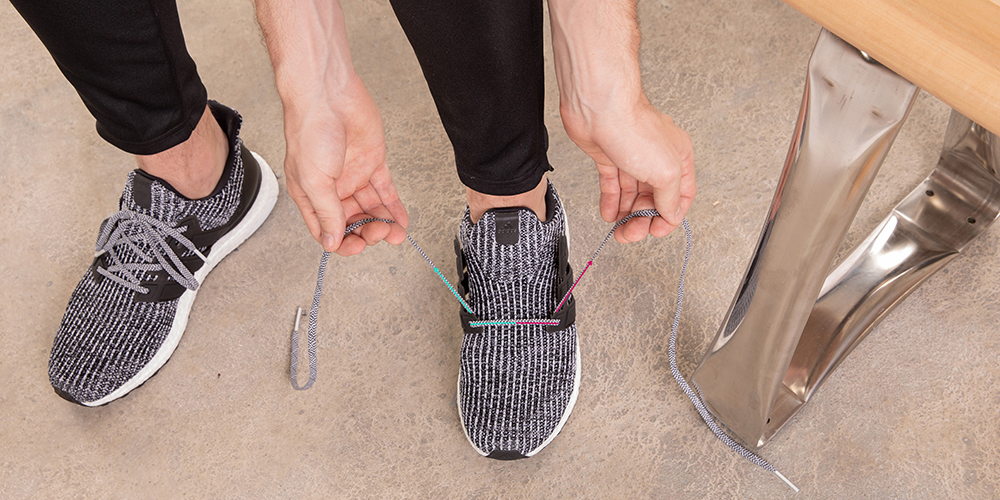
Step #1
Thread the lace through the bottom eyelets until you have an equal amount of lace on each side.
Step #2
Thread the left lace through the right eyelet and the right lace through the left to create a diagonal “X” pattern. Continue pattern until you reach the area of your foot that needs more room.

Step #3
Run the right and left laces straight up the inside of the shoe for one or two eyelets, depending on how much room you need to create a gap.
Step #4
Return to the crisscross or “X” pattern lacing above the gap until complete and tie laces into a bow knot.

WIDE FOOT
Designed to open up the front of the shoe to create more space for wider feet or extra breathing room for runners. Note: The example below creates extra space up to the third eyelet, but it can be made as large as needed.
Step #1
Lace the bottom eyelet(s) until you have an equal amount of lace on the left and right.
Step #2
Run the right and left laces along the inside of the shoe and into the second eyelet. Then repeat this step to the third eyelet, giving you plenty of room in the front of the shoe.
Step #3
Begin lacing as you normally would in a diagonal “X” pattern with the right lace crossing to a left eyelet and the left lace crossing over to a right eyelet.
Step #4
Continue the “X” pattern all the way up to the final eyelets and tie the laces.
NARROW FOOT
Is your foot sliding around inside your shoe? Are they laced up tight and still not tight enough? If so, there’s a good chance you’ve got narrow feet and need a lacing style that’s a little more snug.
Step #1
String the lace through the bottom eyelet, until the length of the left and right shoelaces match.
Step #2
Thread the right and left laces back and forth in a traditional crisscross “X” pattern. Continue until you reach a middle eyelet.
Step #3
Skip a middle eyelet, leaving them empty, and resume the crisscross pattern on the next available eyelet.
Step #4
Continue the crisscross pattern all the way up and tie the laces off at the top of the shoe.

DIAGONAL LACING
Having a bruised big toe or sore toes after a long run is a common problem experienced by runners. This technique alleviates pressure and pain points by lifting the toe cap on your shoe to free your toes and gain natural motion of your foot.
Step #1
Start with one end of the lace in the top eyelet, leaving enough lace to tie still your shoe, then run it diagonally down to the bottom eyelet above your big toe. Note: The diagonal lace will be mirrored on the opposite foot.
Step #2
From the bottom eyelet next to your big toe, thread the shoelace to the opposite bottom eyelet.
Step #3
Next, thread the lace diagonally across to the next open eyelet. Then thread it straight across to the opposite side and through the adjacent eyelet.
Step #4
Continue stringing the shoelace, diagonally into the next available eyelet and straight across to the adjacent eyelet until reaching the final eyelet. Finally, tie the laces together at the top of the shoe.

RUNNER’S LOOP
Runner’s Loop or heel-lock lacing is an incredibly common technique for runners because it creates a super-tight finish that prevents your heel from slipping. For trail and/or long-distance runners, this style is an extremely helpful way for your shoes to stay tight even while running on uneven surfaces.

Step #1
Create an equal amount of shoelace on the left and right side of the bottom eyelet.
Step #2
Take the left lace across to the next available right eyelet and the right lace across to the next left eyelet in a diagonal “X” pattern. Continue crisscrossing the laces until the top two eyelets.
Step #3
Before the final eyelets, take each lace directly up to the eyelet above on the same side of the shoe – threading from the outside-in to create a loop.
Step #4
Run the laces straight across and through the adjacent loop; pull tight to lock your heel as you tie the laces into a simple bow as you normally would.