

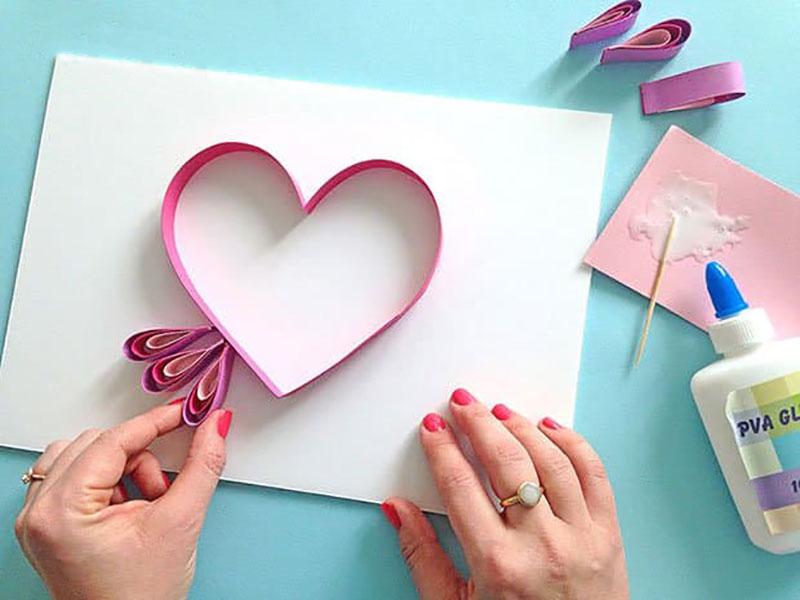
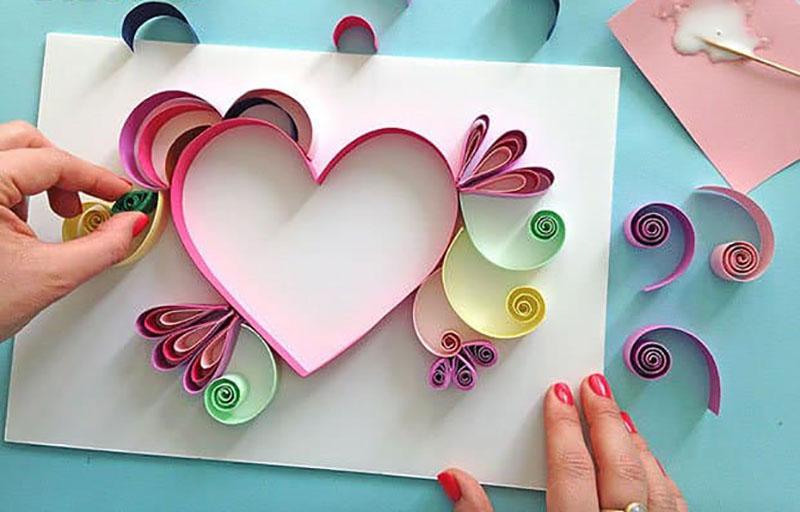
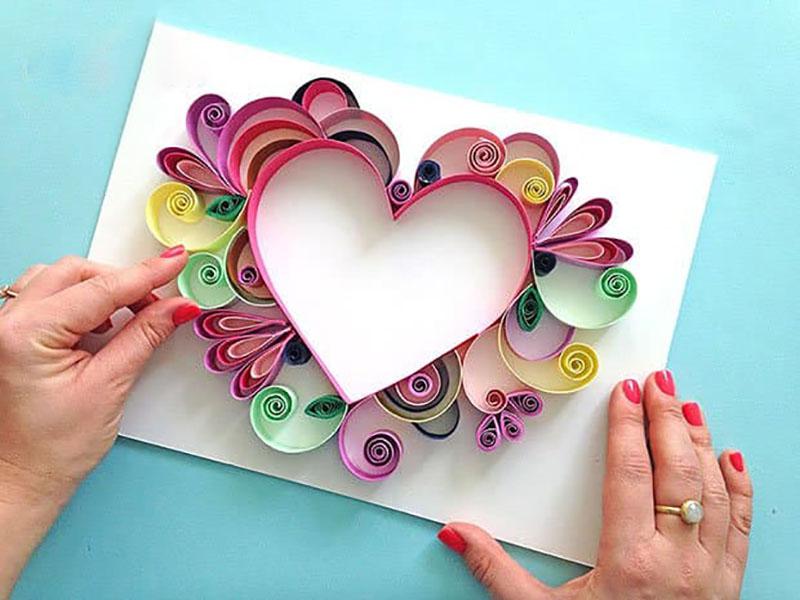
6. How to Make a Paper Quilling Card for Mother’s Day
There are five steps that you need to learn, then you’ll DIY a paper quilling card.
Step 1: Draw a heart shape on a cardboard

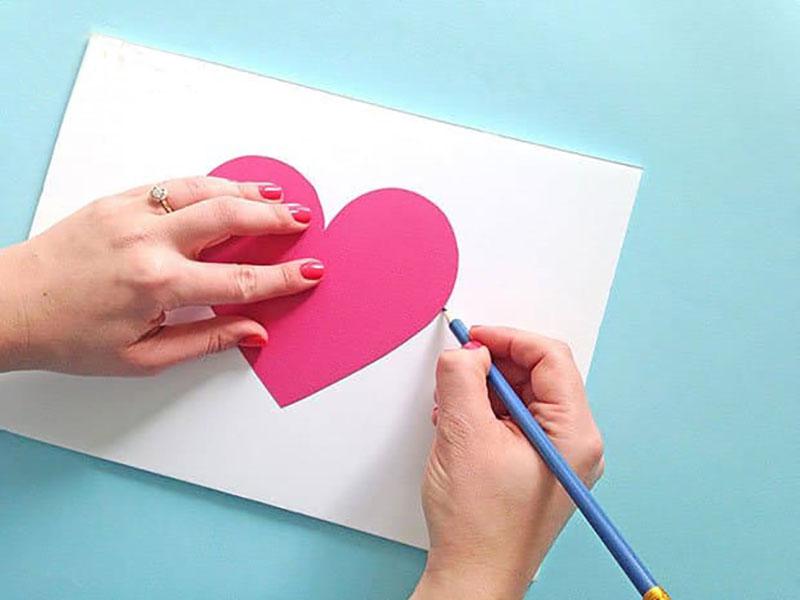
Choose a suitable cardboard and draw an outline of a heart shape with a pencil.
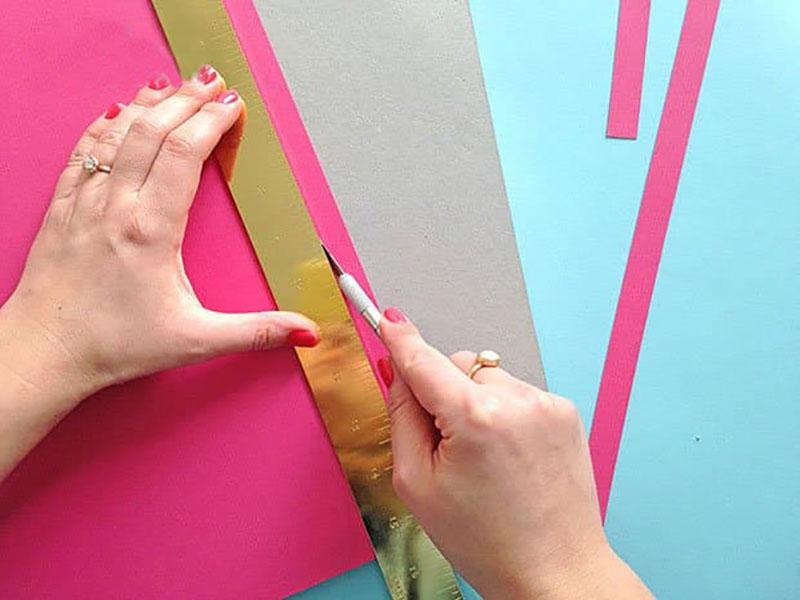
Step 2: Cut the colored paper into strips with 1.5cm width
Step 3: Make the outline of heart template
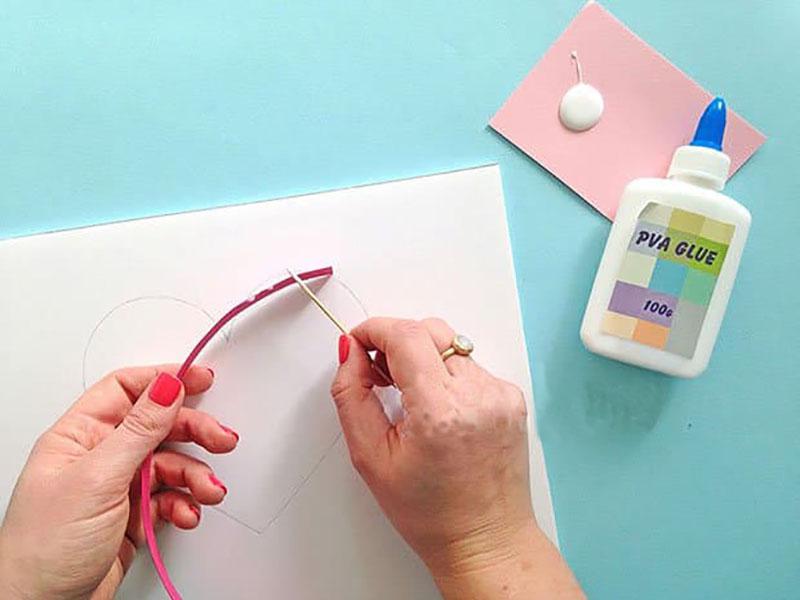
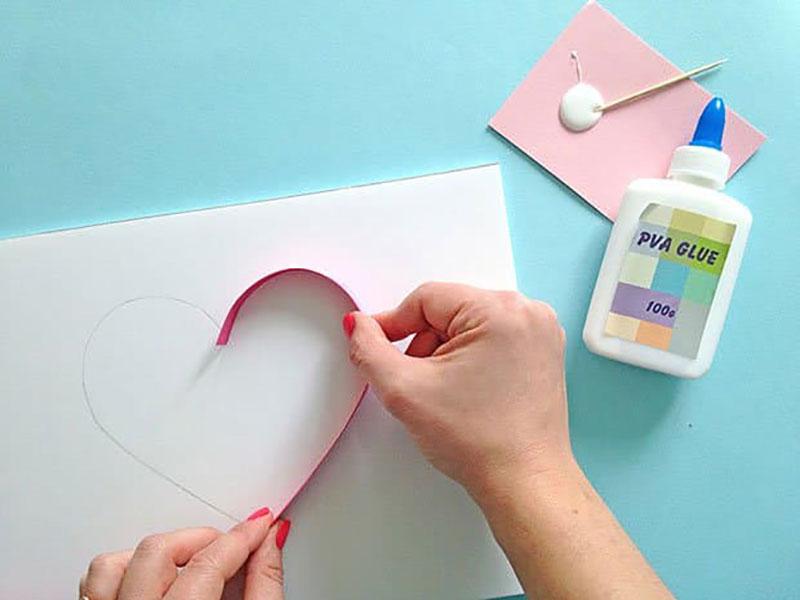
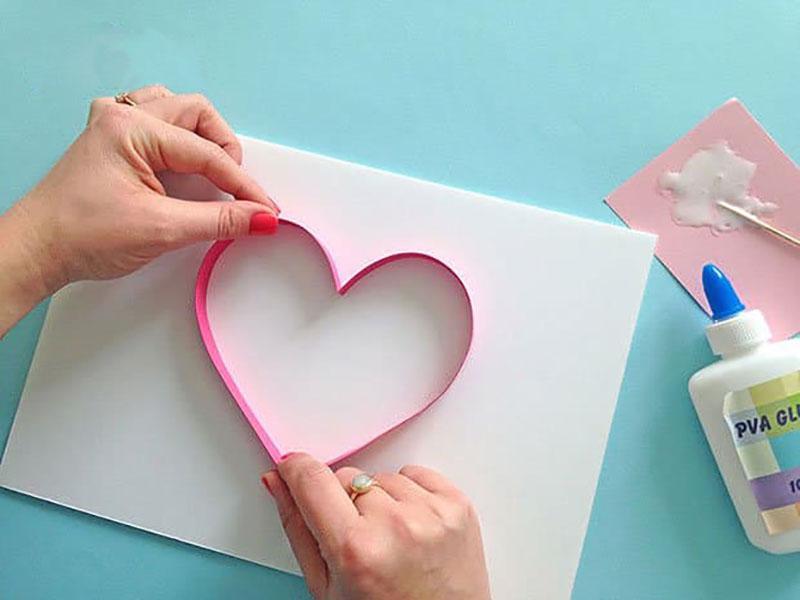
Apply some PVA Glue on the bottom of the strips and then stick it around the heart template which you have drew before.
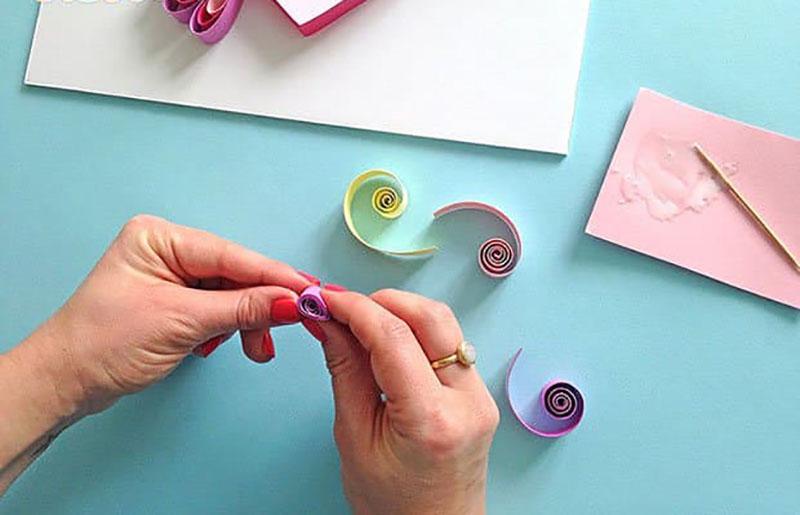
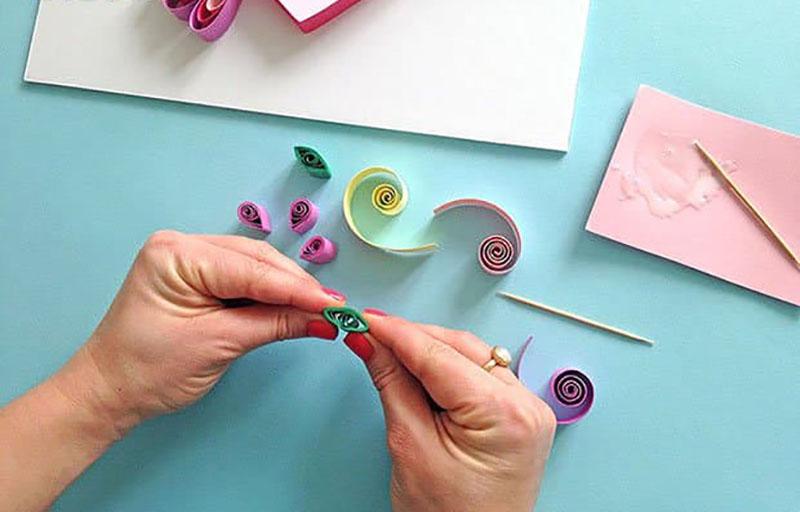
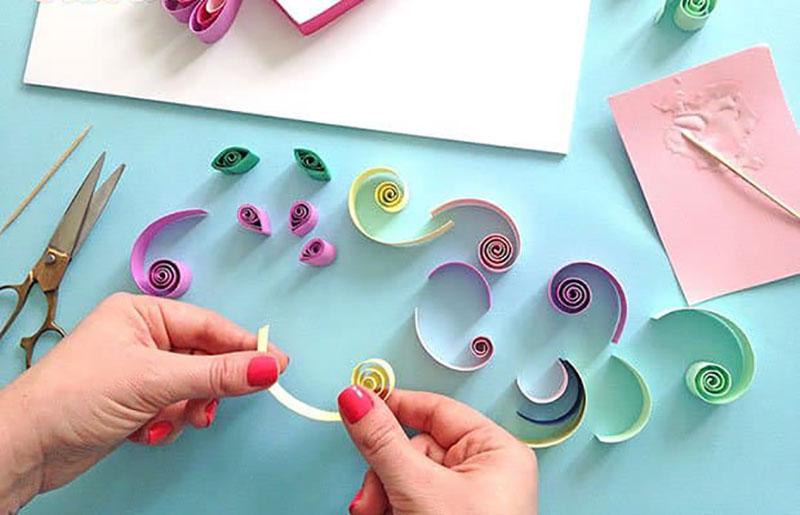
Step 4: Process the decorations making
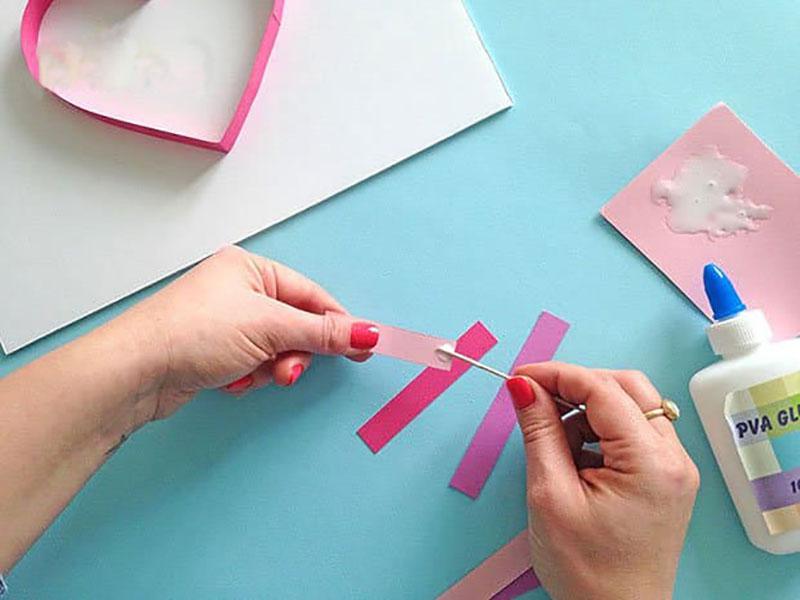
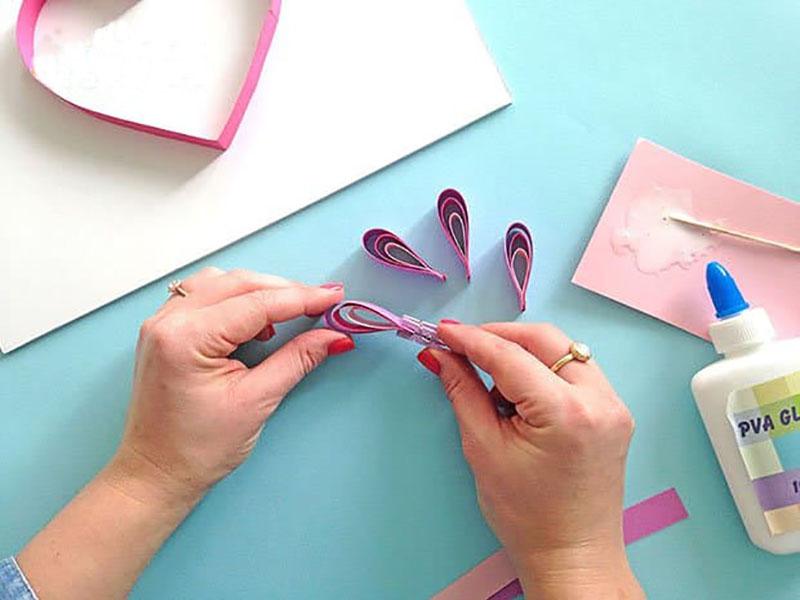
Cut the strips into different length. And then curl the cut strips one by one (please note curl the strips from short to long and then stick them with PVA Glue, and fall into a pattern with a clip), refer to above operation (here you could make different types of curls according to your imagination).
Step 5: Stick all these curls to the heart.


7. How To Make a Leaf Skeleton
Remove leaf tissue to see a beautiful “skeleton” of veins! This project can be done with a variety of fresh leaves in the spring, summer, or fall.
Step 1: What you need
- Leaves
- Sodium carbonate (washing soda)
- Spoon
- Pot (not aluminum)
- Paintbrush
- Soft bristle toothbrush
- Shallow dish
Step 2: Simmer the leaves

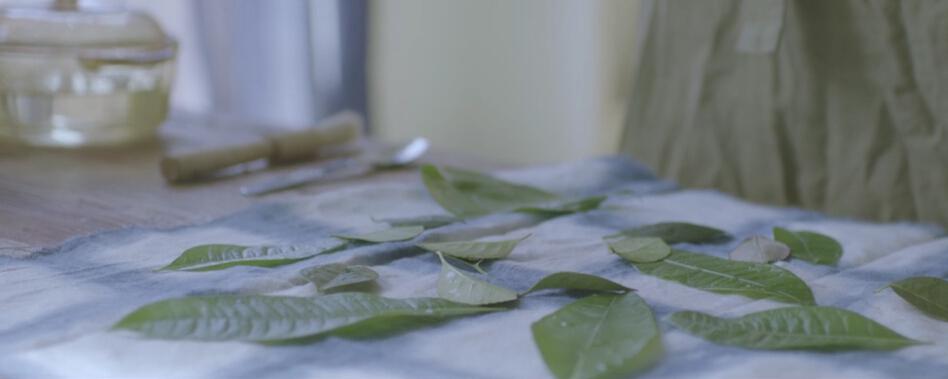

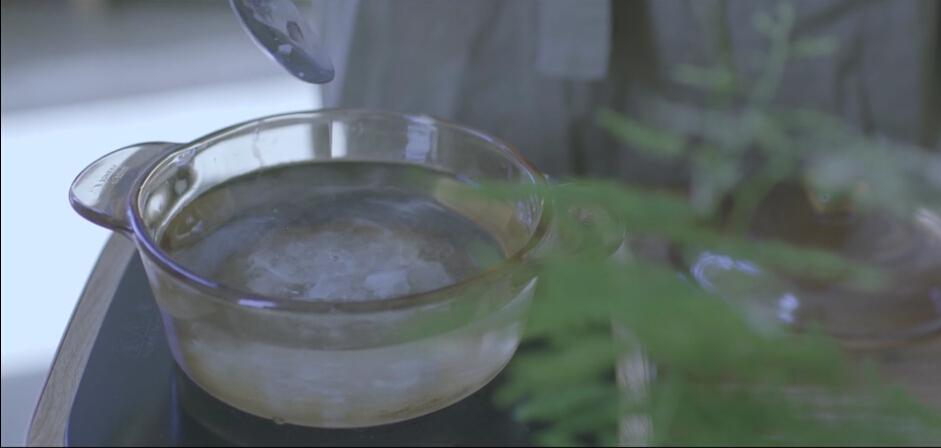

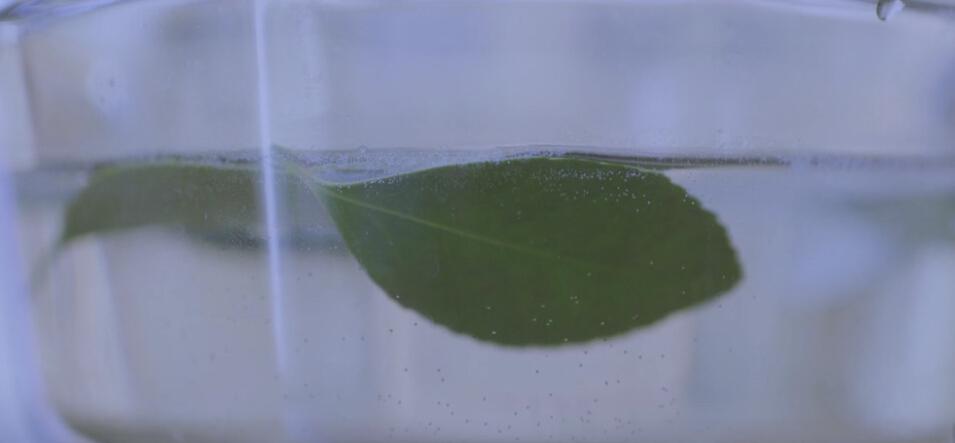


- Wash the leaves
- Put a half liter (a little more than 2 cups) of water into the pot.
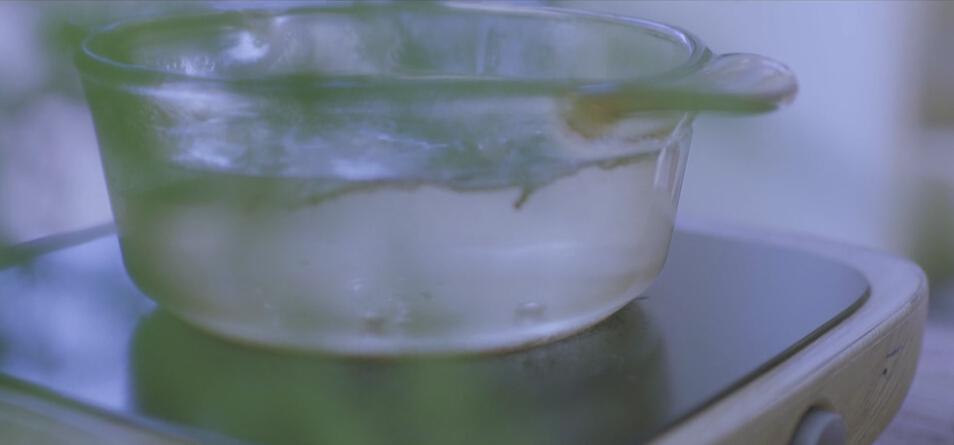
- Add 4 teaspoons of sodium carbonate to the water. Place the pot on a stove burner and stir to dissolve the sodium carbonate in the water. Heat the mixture on the stove until it just starts boiling.
- Add the leaves to the mixture in the pot and turn the heat down to simmer.
- Let the leaves simmer in the mixture for about 30 minutes.
Step 3: Remove the leaves, brush and put them into fresh water

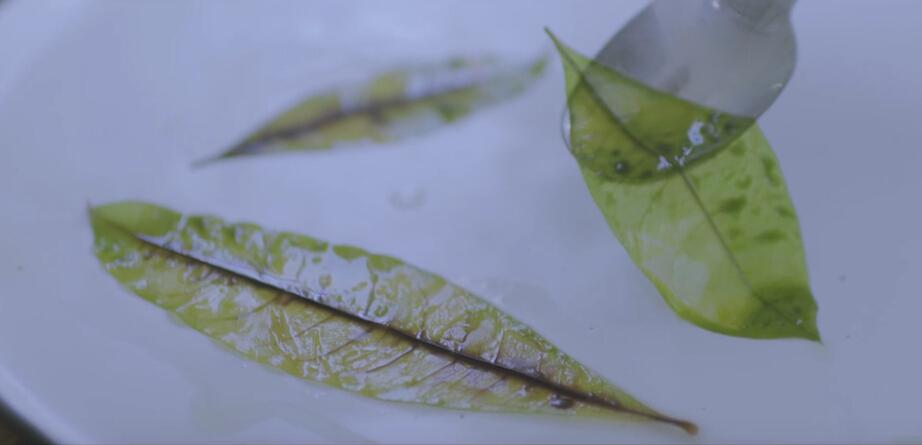

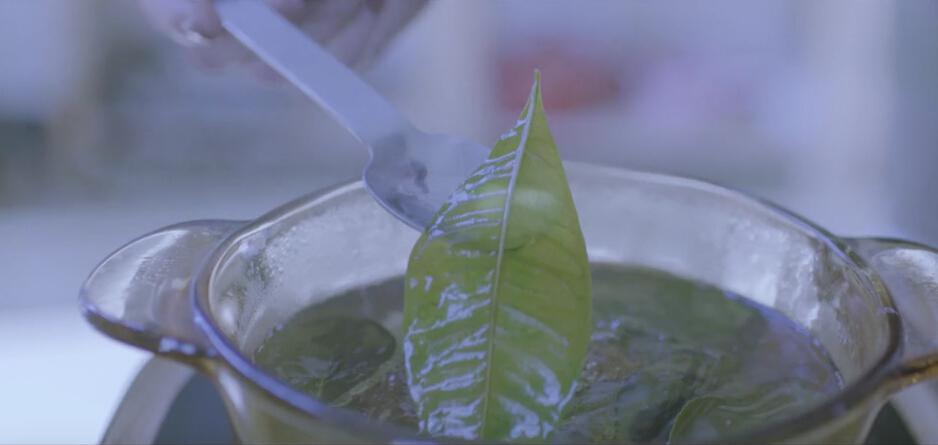

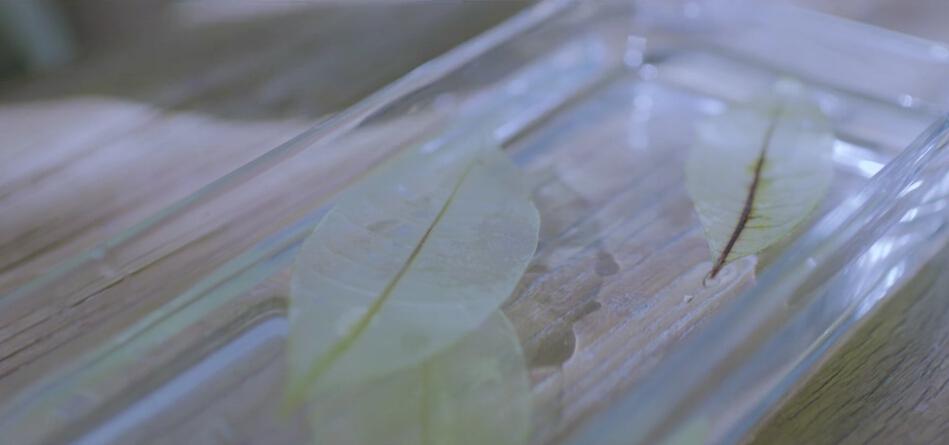

- Use the spoon to carefully remove the leaves from the pot and transfer them to a shallow dish.
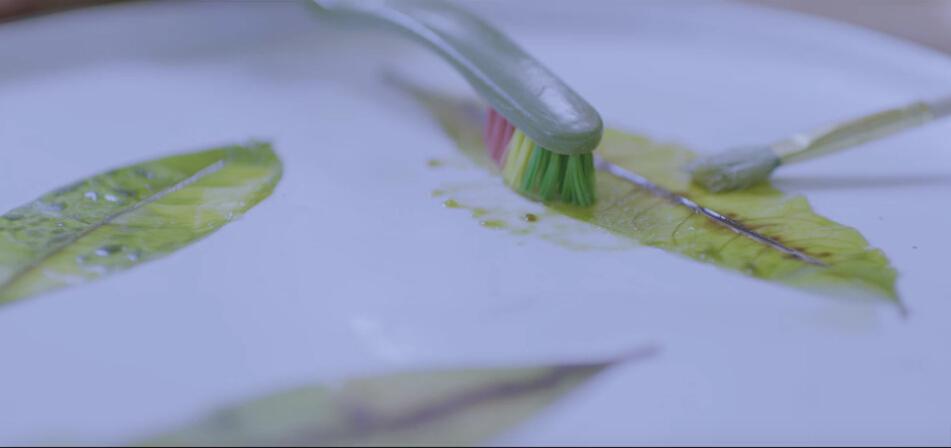
- Use the soft toothbrush to carefully brush the green parts of the leaf.
- Put some cool water in a shallow dish and put these brushed leaves into it.
- Let it air dry on a clean paper plate while you work on more leaves.
Step 4: Decorate the leaf skeleton


- Press the leaves flat with two pieces of tape.
- Cut off excess tape along the shape of the leaves.
- Try framing your leaf skeleton, or using it to decorate a homemade card.
Materials:
- Leaves
- Sodium carbonate (washing soda)
- Spoon
- Pot (not aluminum)
- Paintbrush
- Soft bristle toothbrush
- Shallow dish
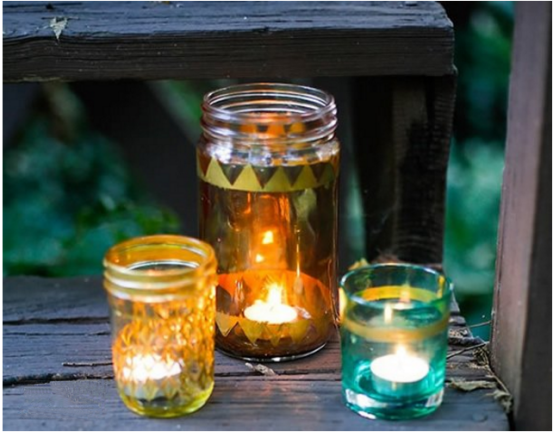
8. DIY Glass Candleholder Tutorial
There are main three steps.

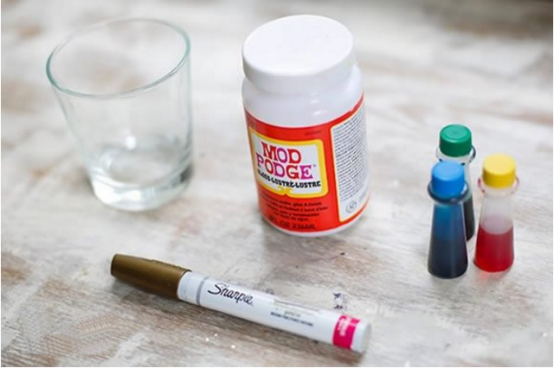
Step 1: Mixing 7-9 drops of food coloring, 1/2 spoon of water and one spoon of mod podge in the glass and then coating around the internal surface.

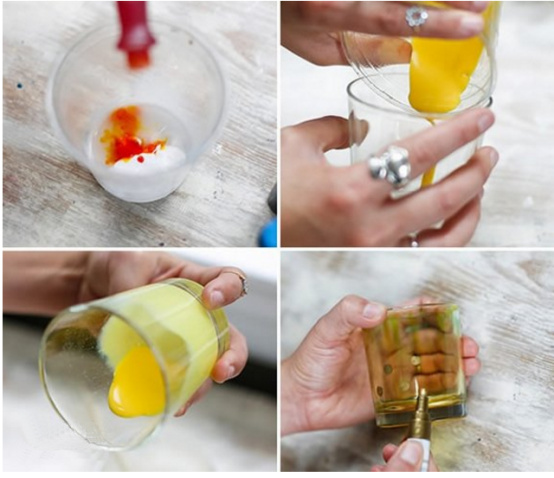
Step 2: Drying at least 45 minutes and then Baking fort 1H with 225 degree.

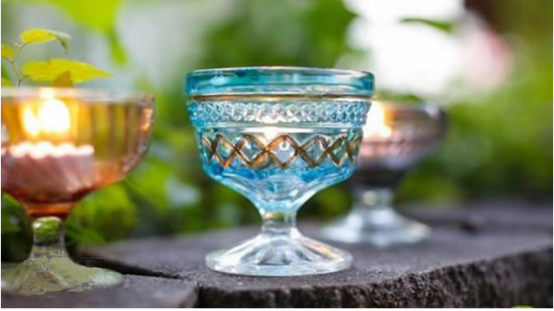
Step 3: After its cooling, painting some patterns with the gold solid marker as you like.

Materials:
- Glass
- Food Coloring
- Gold Solid Marker
- Glass Mod Podge
9. How to Make a Indigo Dye Macrame Wall Hanging
There are three steps that you need to learn, then you’ll get a indigo dye macrame wall hanging.

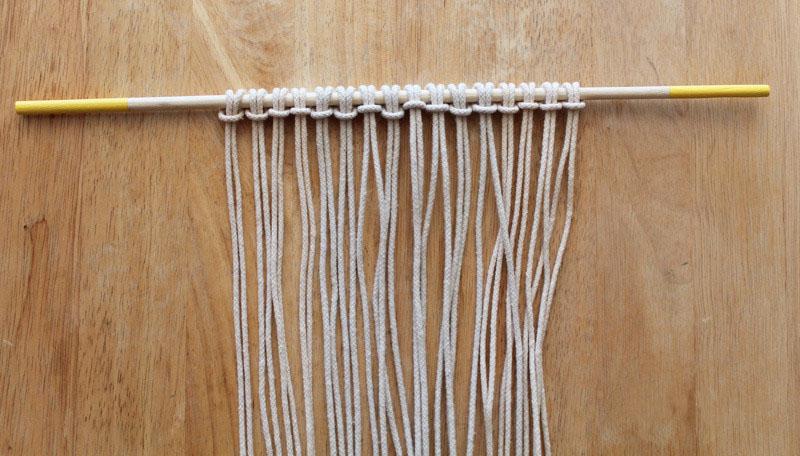

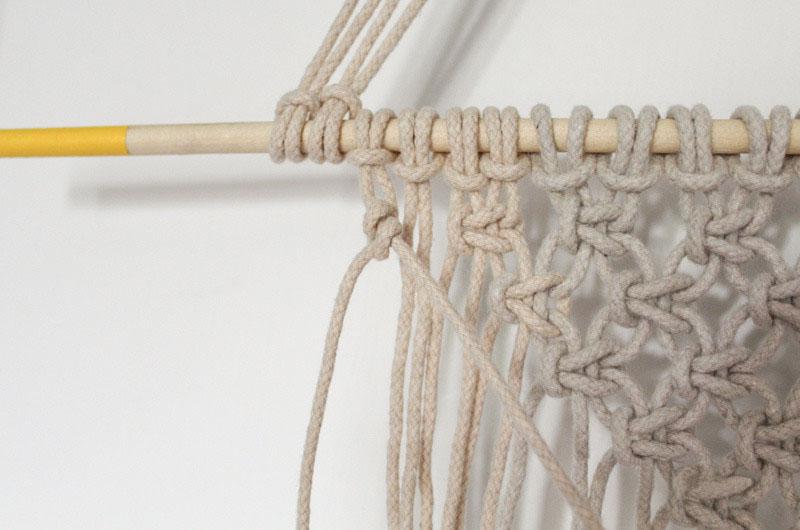
Prepare 16 ropes and each with 1.5 meters long. Then tying the cords onto the 3 feet long pole.
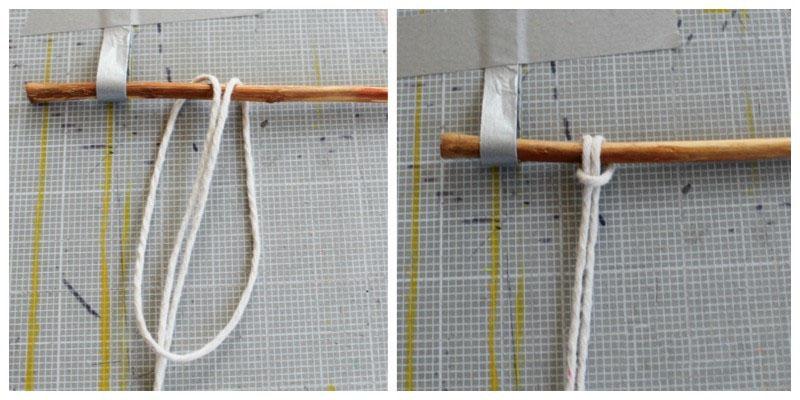
Step 2: Make Square Knots

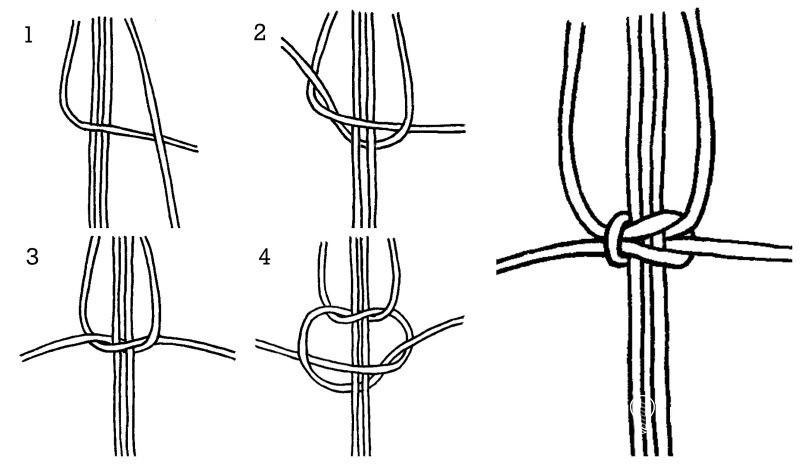

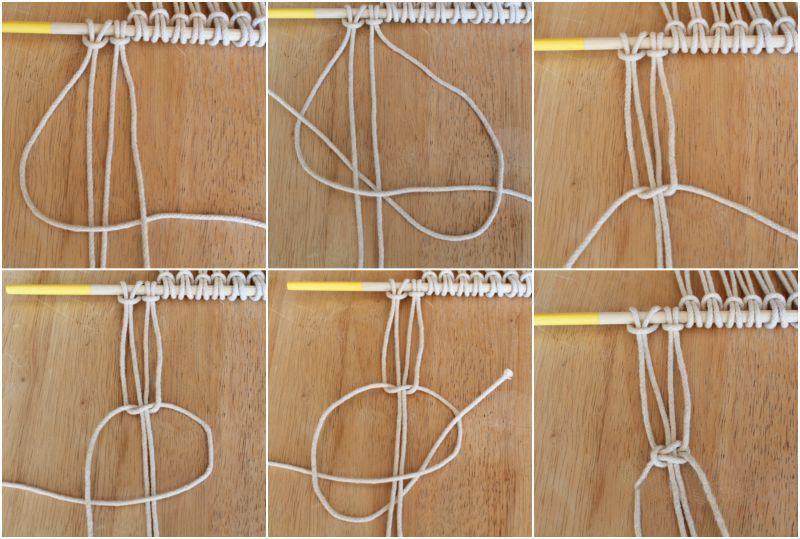


Choose the left and right four ropes and make square knots with them for twice. Then Tied these two knot ropes together as a hanger. Refer to below operation.
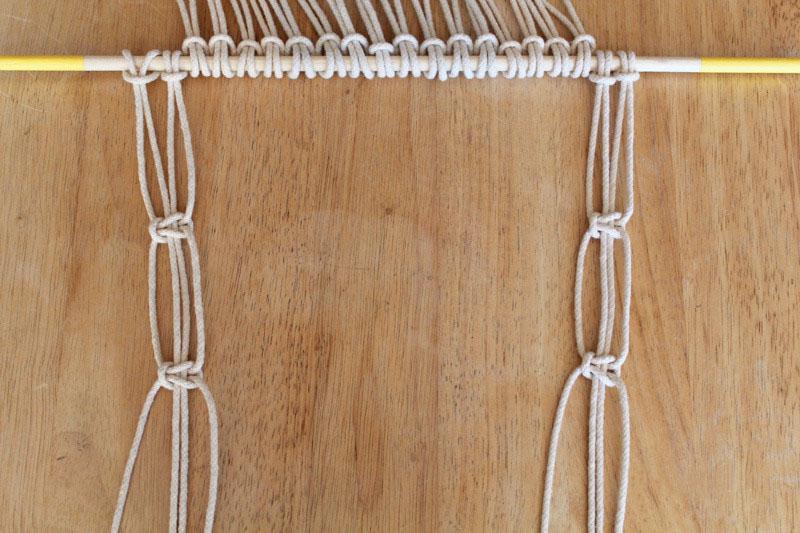
Step 3: Process the Pattern Making
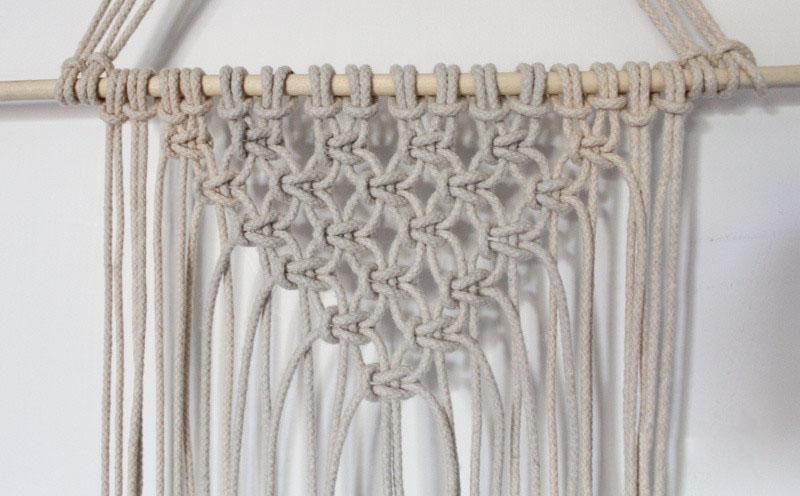


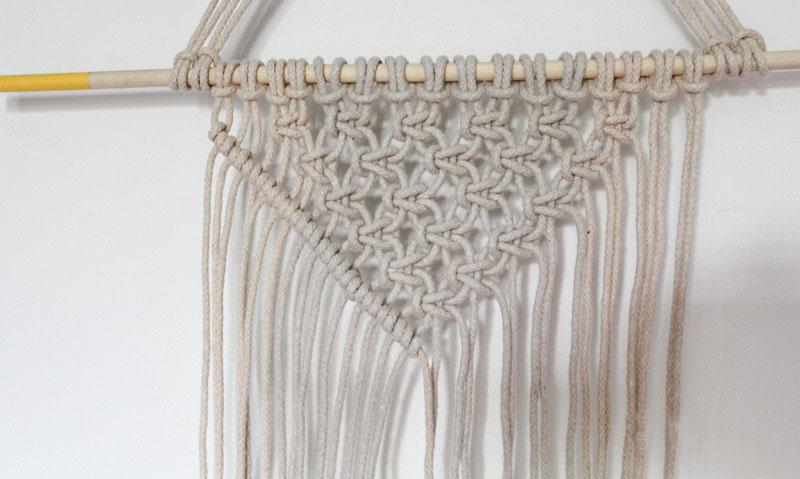


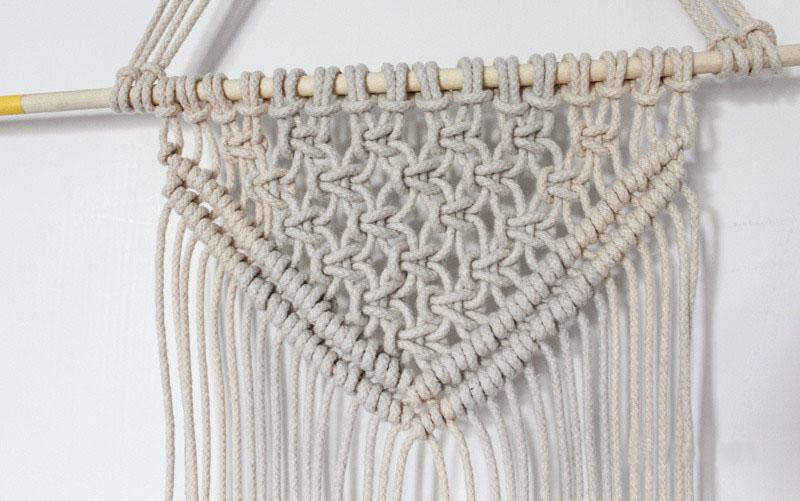
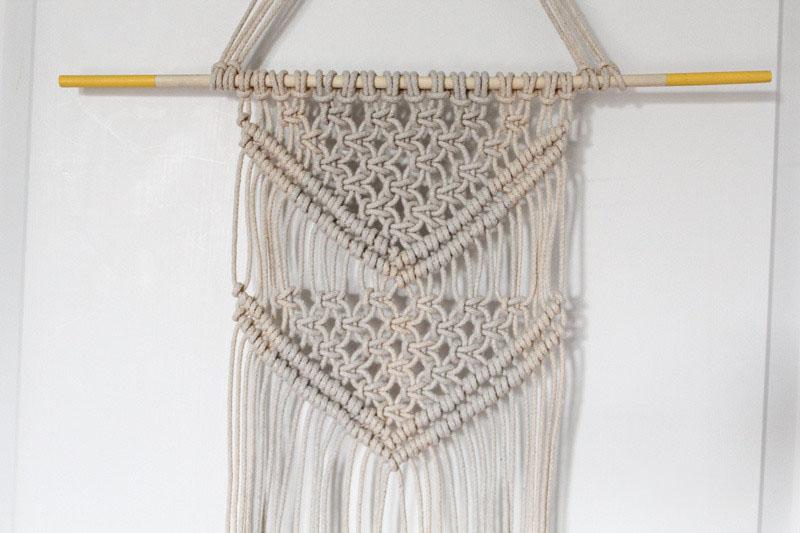
Make square knots with the rest of ropes and then making a triangle patterns.(all are made of square knots).
First if all, skip the left and right four ropes, and then begin the knot making from left to right. The first row should make 6 square knots totally. Then from the second row to six row, there should be 5 to 1 square knots making decrease progressively.
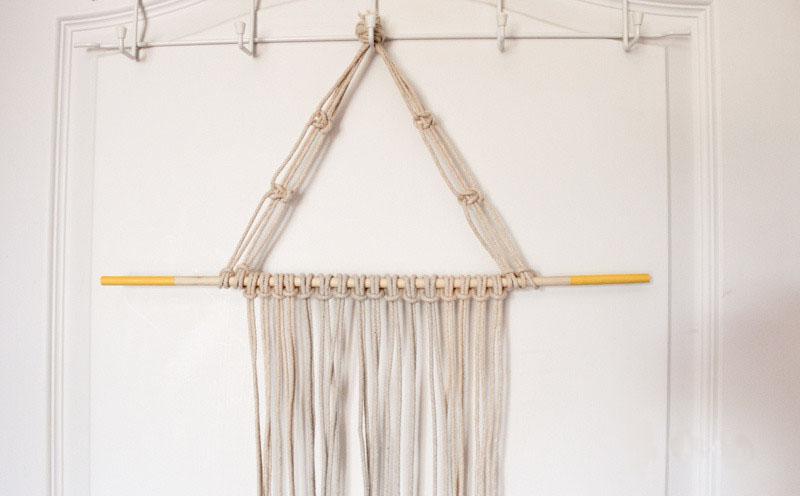
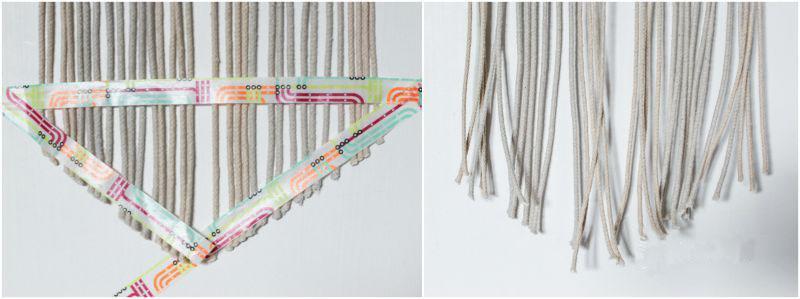
And then make the second triangle pattern according to the making of the first one.
Cut the the ropes which are not knot yet into inverted triangle shape. And Indigo the end of ropes as you like.
10. How To Make an Epoxy Resin Necklace
I am gonna sharing how I made an epoxy resin necklace.
Step 1: Gather what you need


All these resin supplies are listed at the end of this tutorial.
Now you should cut every wood into 3pcs for matching the molds you have. If your mold is new, wash it with hot water and soap. Let it dry. Then, wipe the mold making sure there is no fluid in the cups. Now you can put wood chip pieces into the mold.
Also if you new to resin crafts DIY. You should search lots of DIY tutorials on this. Then choose to start your own projects.
Step 2: Prepare the resin


Prepare the resin mix according to the package directions. Here i am using 3:1 for the mixing ratio. Use the craft stick to slowly drop the prepared solution into each mold. If you want to get it colorful. You can add a little color essence in the epoxy resin solution. Let the solutions settle for five minutes. If air bubbles appear you can pop them with the craft stick. Do not touch it while it is curing. I have searched that at least 16 hours would be better at this step if you want to get best results. It will be smooth when finished hardening.
Step 3: Turn your cast into jewelry


Now it is the time to remove the resin pendants from the mold. After removal, you can trim it with sandpaper. Just trim the edges would be better. Coz you will damage the surface if you sand the front part.
Tips for you:
If you left fingerprints on the resin pendants, just left it curing for 3 days. Wet sand the surface you left fingerprints on until there is no flaw. Then air dries it overnight. You can apply a thin coat with a small paint brush to the new surface. And dry it for another time. You will get a gorgeous pendant now with no fingerprints on.
Materials:
- Tools ( knife) for processing the wood
- Pliers
- Wood chip pieces
- Molds set
- Disposable measuring cup
- Stirring sticks
- AB glue
- Color esse