

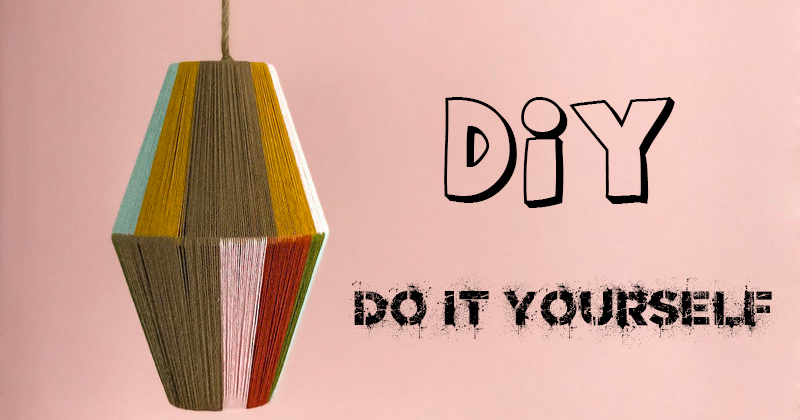
Do you know what’s great about DIY projects? Here are 12 awesome DIY projects ideas to inspire you to get crafting and creative.
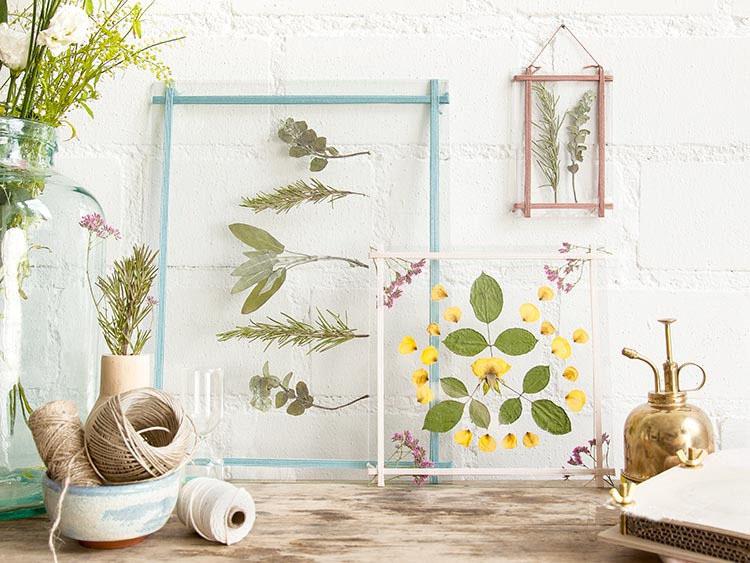
1. How to diy a pressed flower frame
There are two steps that you need to learn, then you’ll get a pressed flower frame.
Step 1: Prepare dried flower and glasses

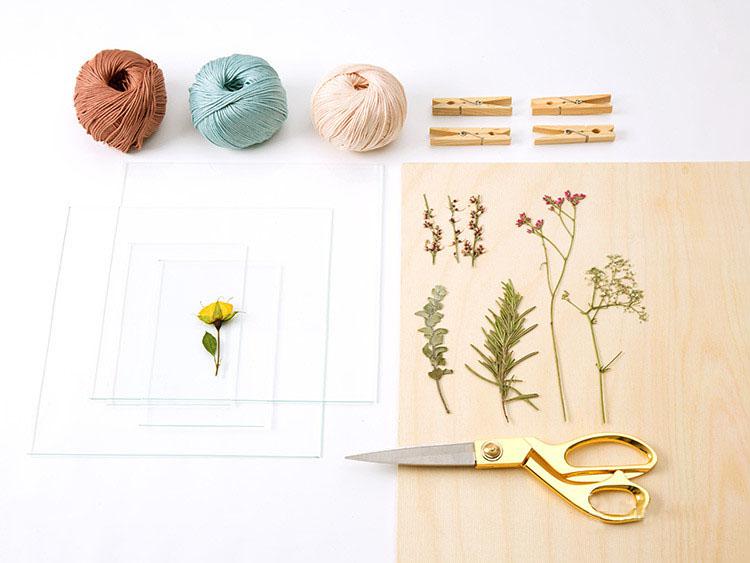
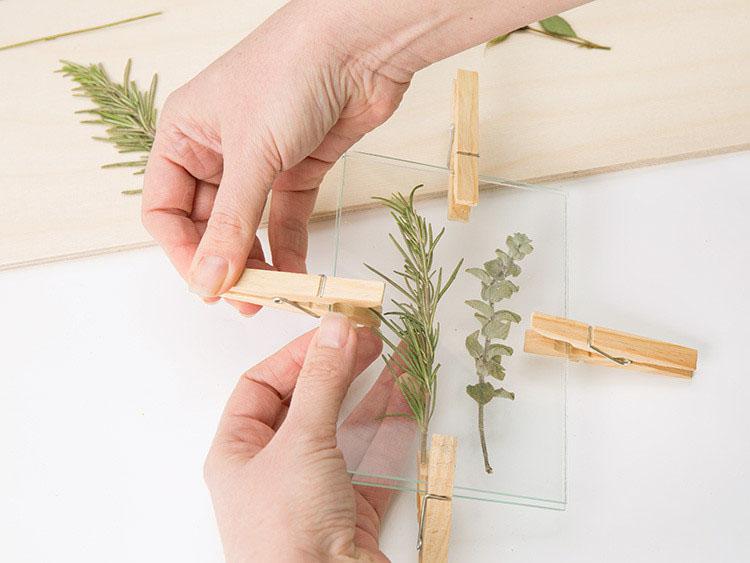
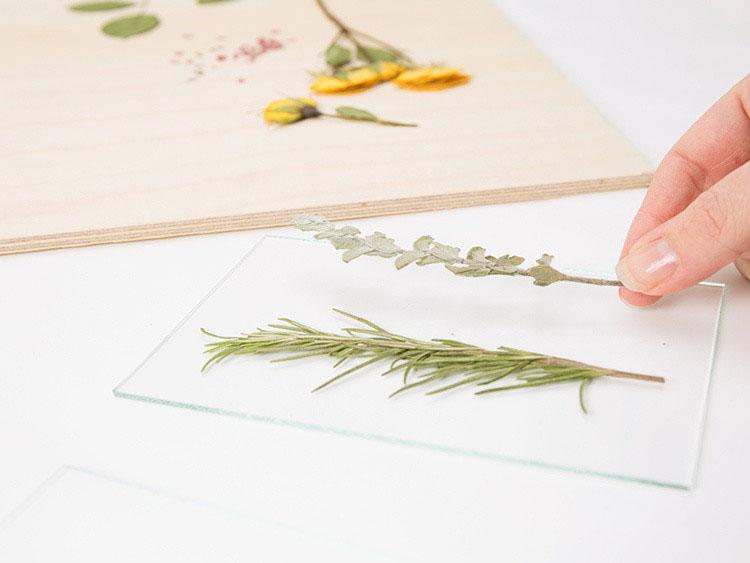
Pick plants and flowers as you like. Fix them between two pieces of glasses. And clamp it with clamps.
Step 2: Make the frame
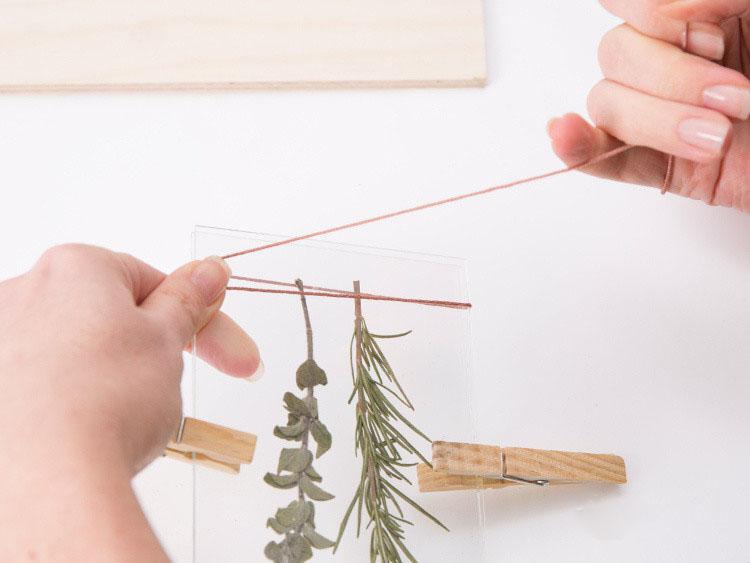
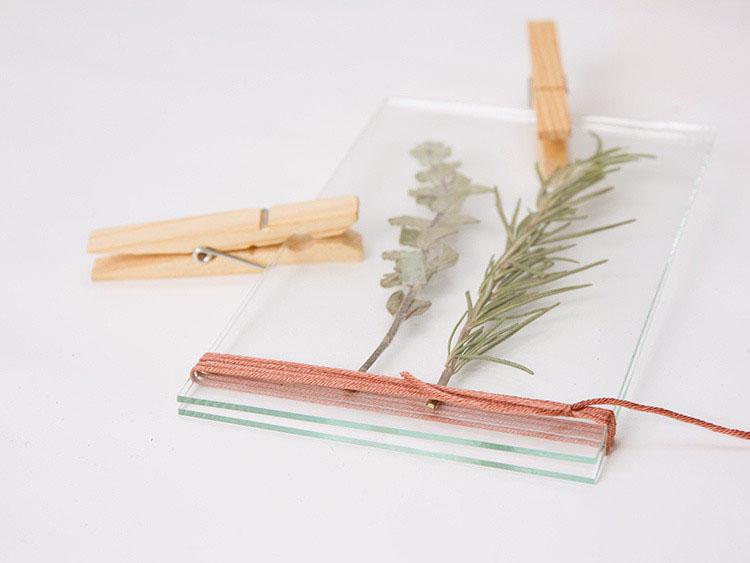
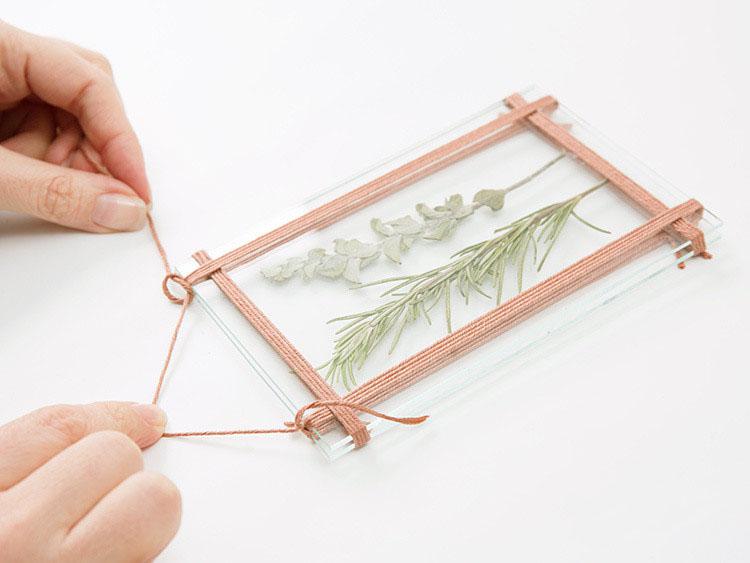
Binding glasses with hemp ropes.
Tips:
- Strip excess foliage from flowers and cut stems to desired length (no shorter than six inches). To help flowers retain their color during the drying process, make sure to remove them from sunlight as soon as they’re cut. Hang flowers individually or rubber-band stems together to hang a bouquet.
- Find a dark, dry area with good circulation, such as an attic or unused closet. With unflavored dental floss, secure the bottom of the flowers’stems to a hanger so that they hang upside down to dry. Leave flowers for two to three weeks until completely dry.
- Remove flowers from hangers and spray with unscented hairspray for protection.
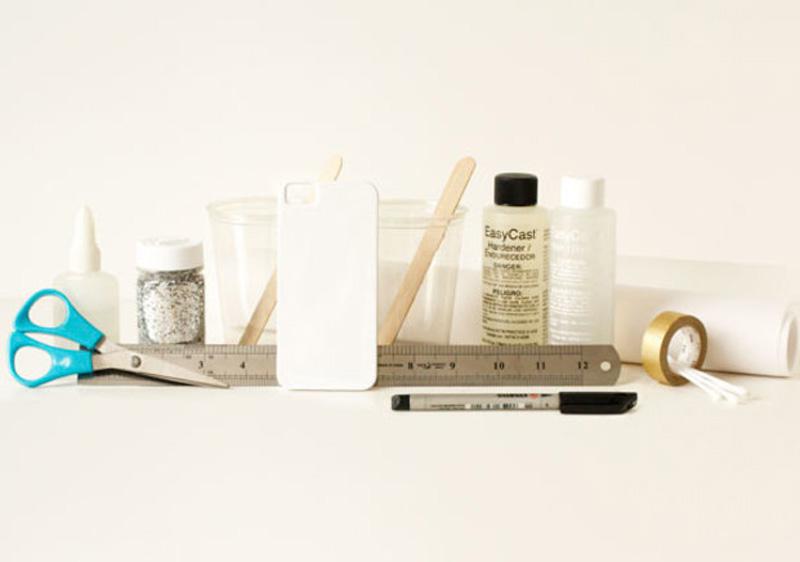
2. FLOWER PHONE CASE DIY
There are four steps that you need to learn, then you’ll get a flower phone case.
Step 1: Get your materials

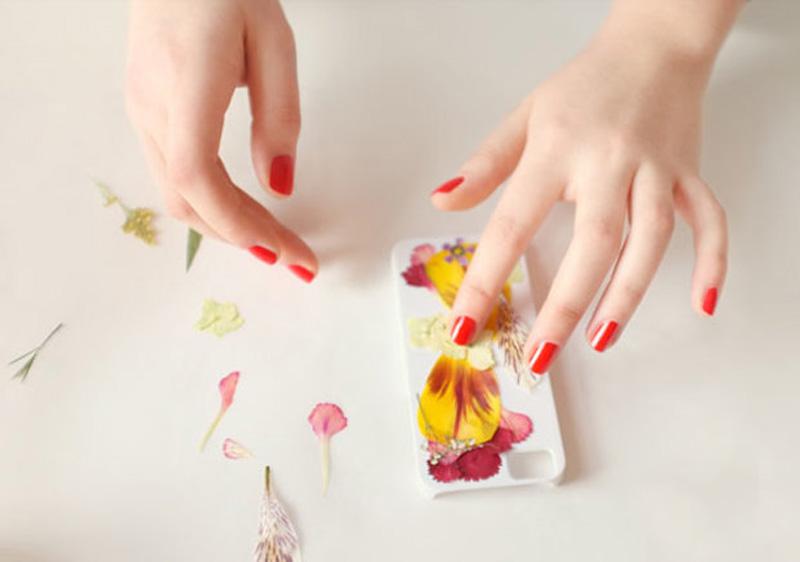
Get your materials, and place these petals on the phone case.
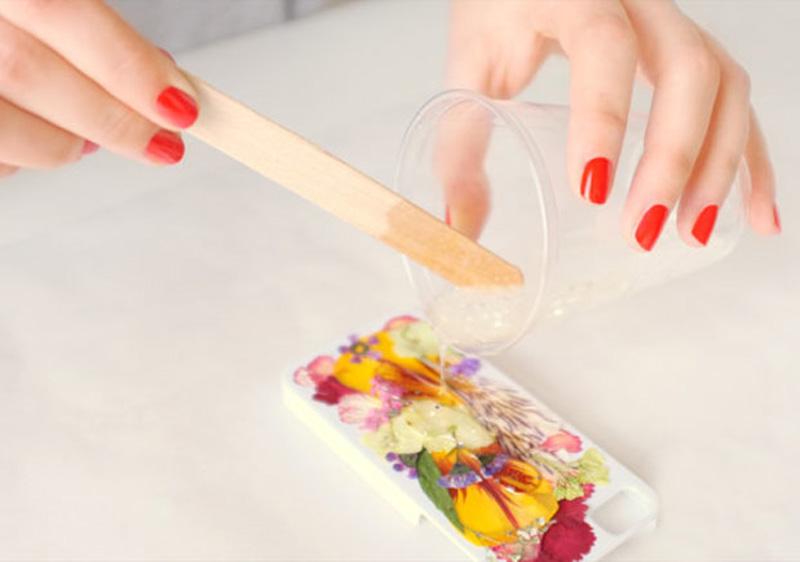
Step 2: Pour into UV resin glue on the phone case
Step 3: Fix all petals

The glue spread out to ensure that each piece of petals are fixed, be careful not to leave air bubbles.
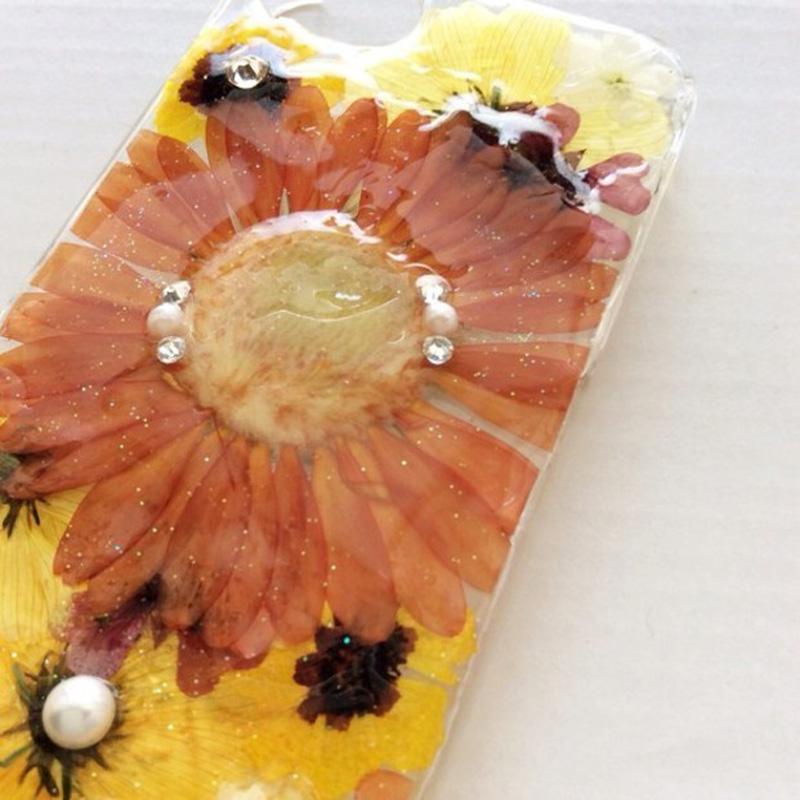
Step 4: Air drying

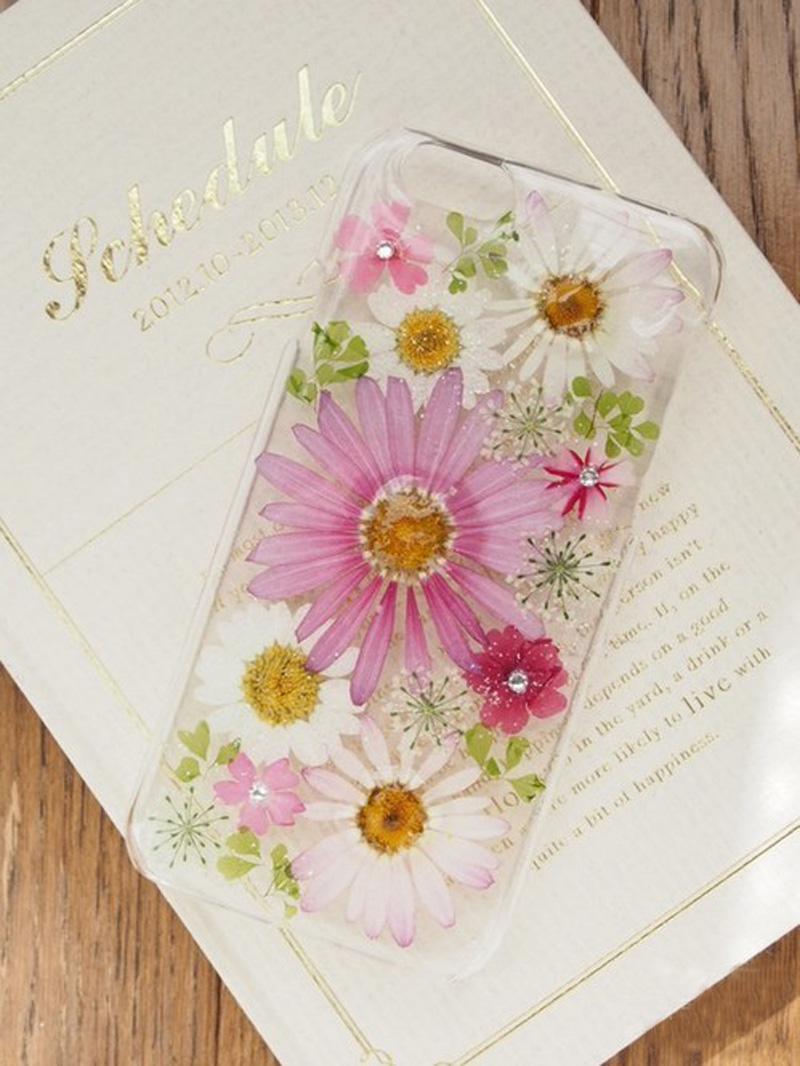
The phone case can be placed in sunlight for one day, let the glue natural coagulation.
Materials:
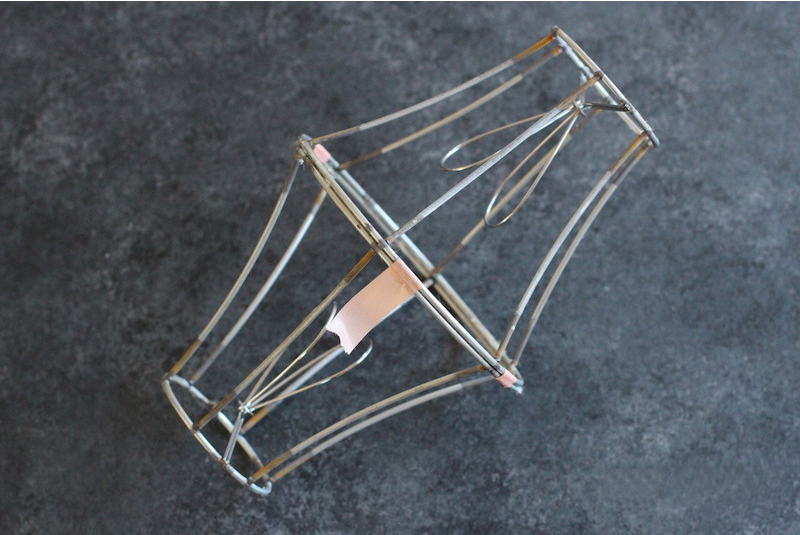
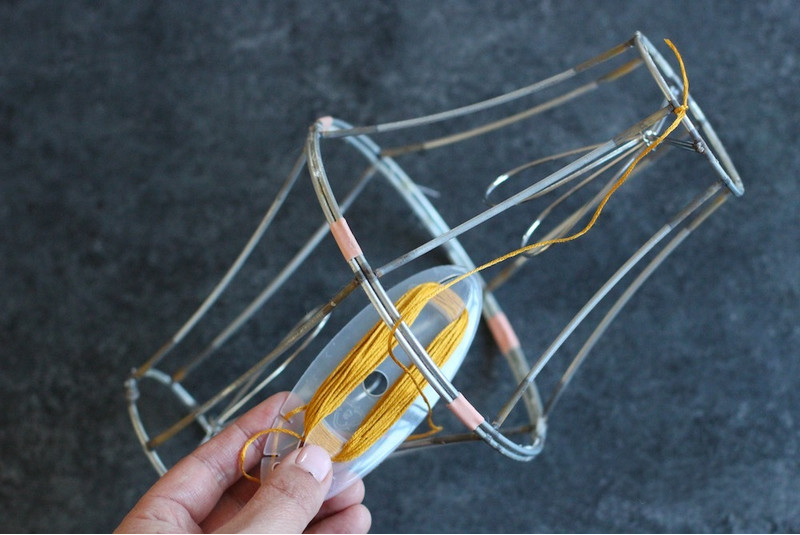
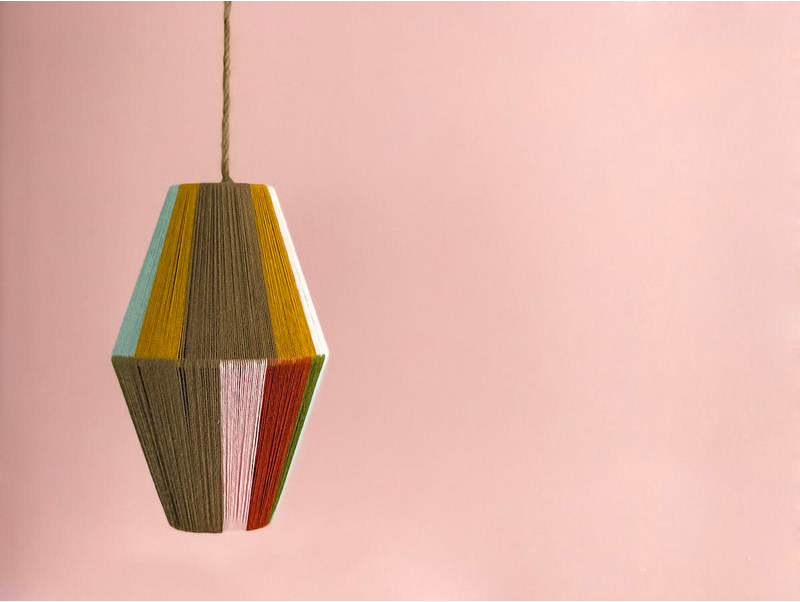
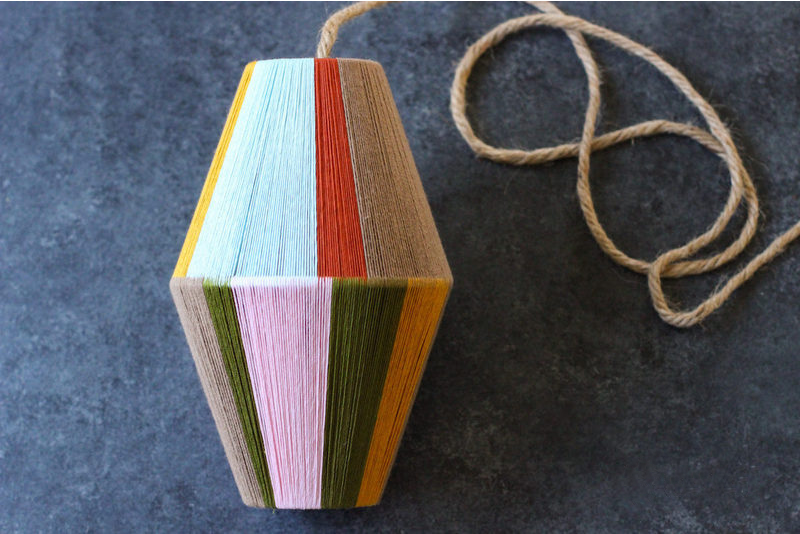
3. DIY Embroidery Thread Lampshade


There are three steps that you need to learn, then you’ll get a embroidery thread lampshade.
Step 1: Fix the two frame together with masking tape.

Step 2: Twine the embroidery thread around the frame up and down with different color of thread. But pay attention to the interval among every thread which you have twined.
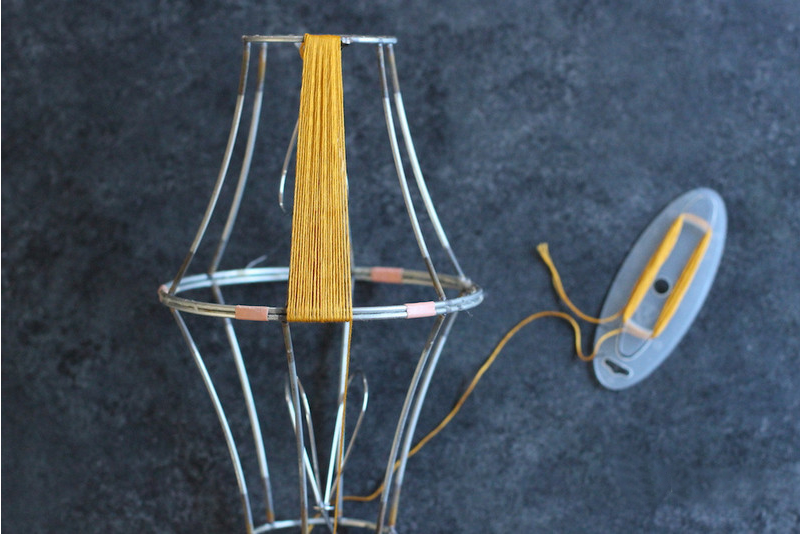
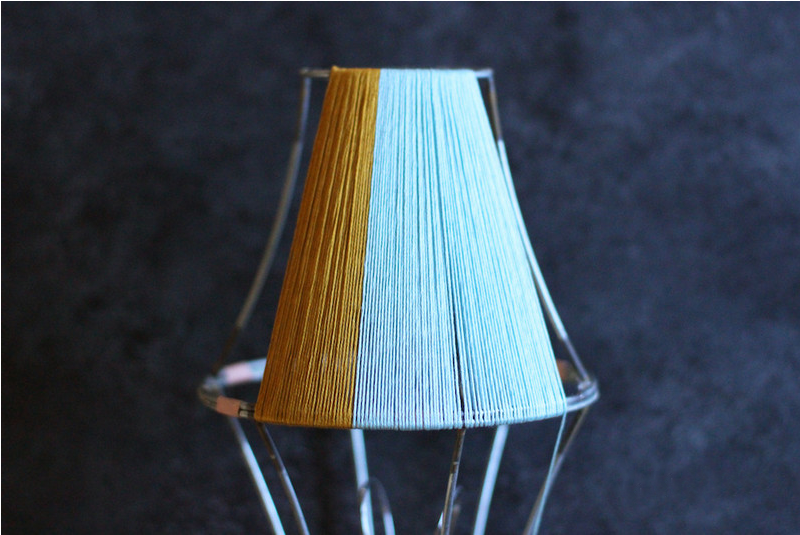
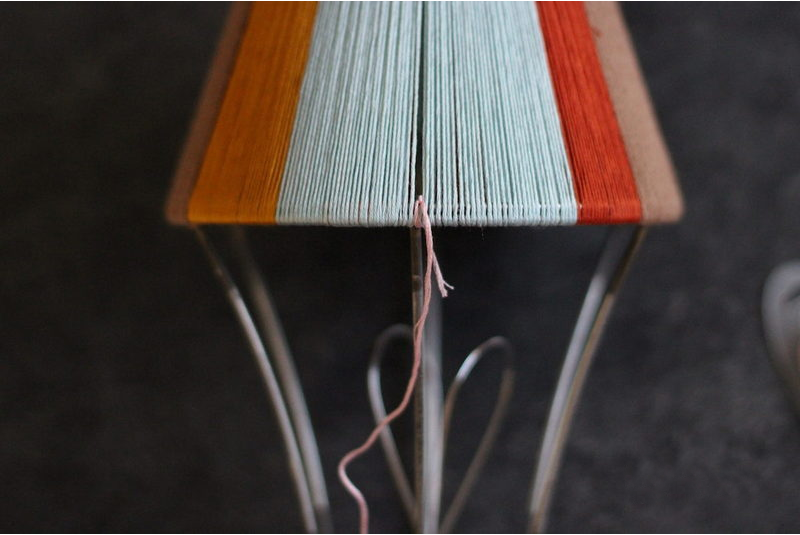
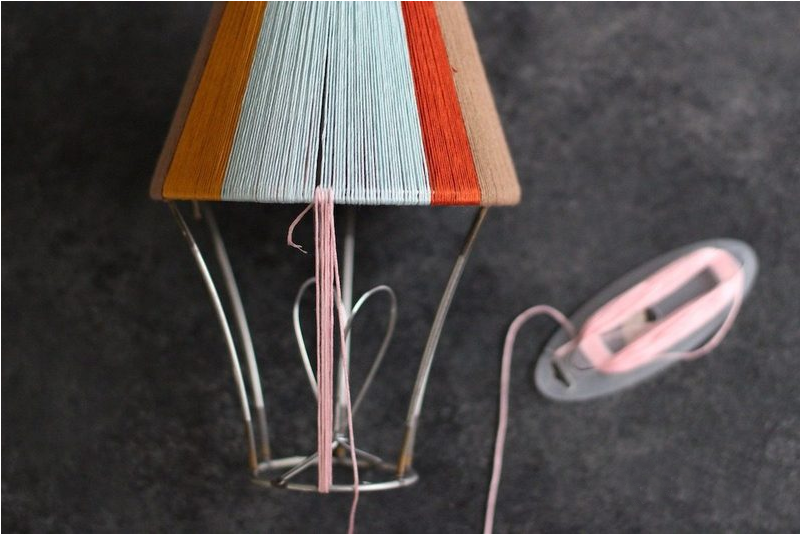
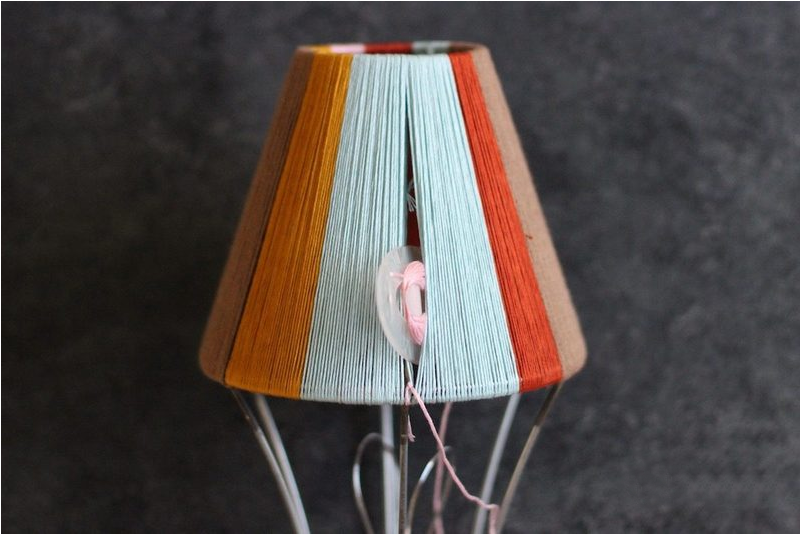

Step 3: After the twine, add a hanging rope and put into a bulb which have install the lamp holder.

Materials and Tools:
- Scissor
- Hemp Rope
- Masking Tape
- Drop light Suite
- Embroidery Thread and Bulb
- Lampshade Frame (two frame with the same diameter)
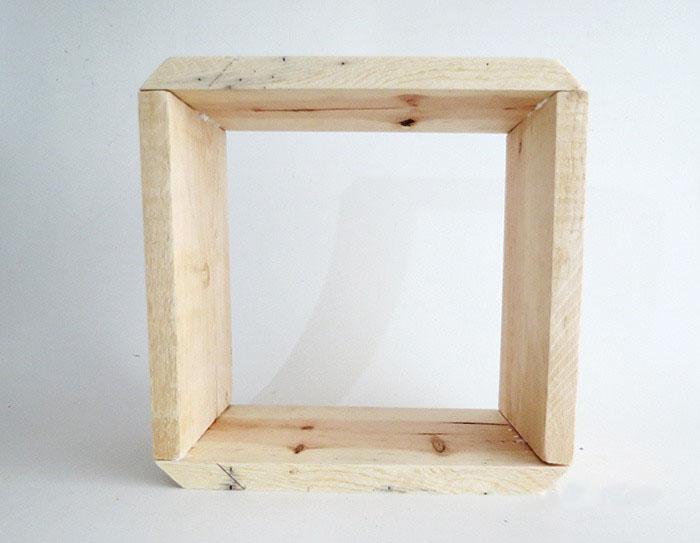
4. DIY Solid Wood Table Lamp With Square Shape Lampshade
There are five steps that you need to learn, then you’ll get a wood table lamp.
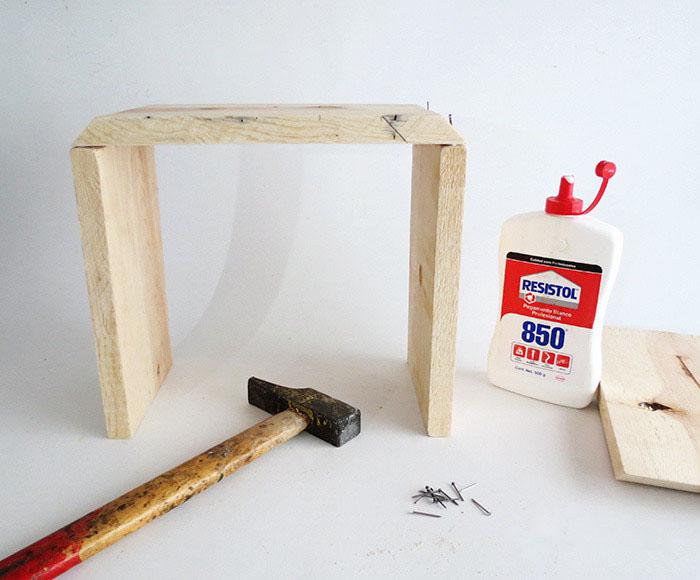
Step 1: Supplies and tools


Cut two of wood boards into 45-degree bevels assemble them with other two boards together using hammer and nails, finishing the color, drilling and installing one LED bulb lamp, fix it on the table using glue. Then you make it !
Step 2: Assembly lampshade


Cut two of wood boards into 45-degree bevels. Drill a hole which diameter is enough for a wire to pass on one of the rest two boards. Put two cut boards on opposite side with the rest boards. Make it into a square shape lampshade. Use hammer with wood nails to assembly the lampshade.
Step 3: Finish the color

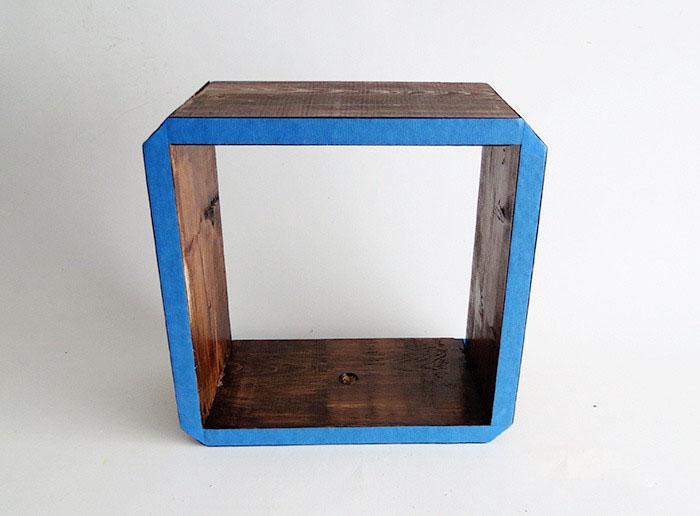
Color wooden boards. Finish the color with your favorite one, vintage style are highly recommend ! Or you can choose the color suits for the table, or decorations in your home.
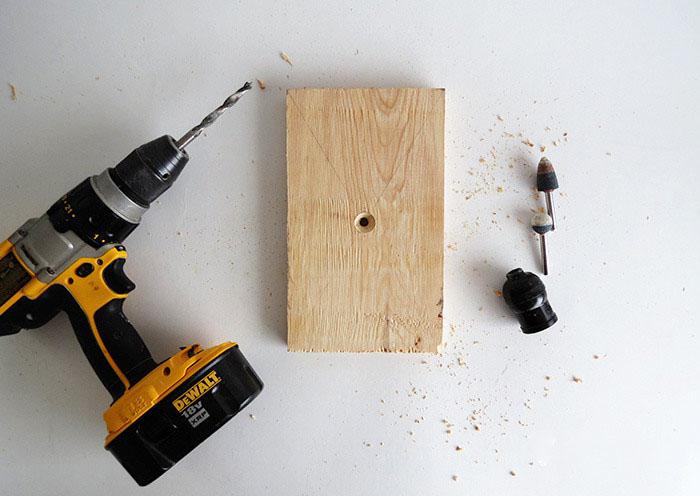
Step 4: Install the lamp

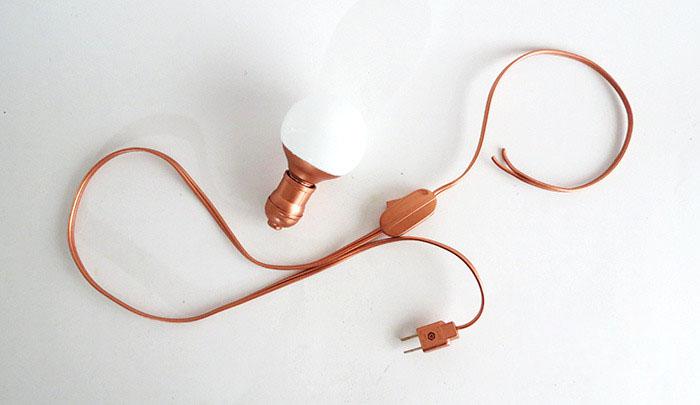

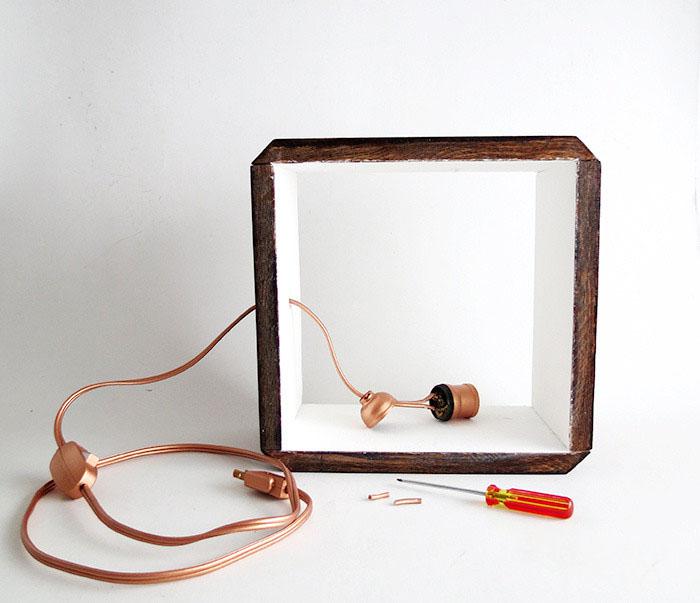
Prepare LED lamp, install the lamp through the hole.
Noted: Cut the wire before install the lamp through the hole and reconnect the lamp with its wire after installing.
Step 5: Fix the table lamp

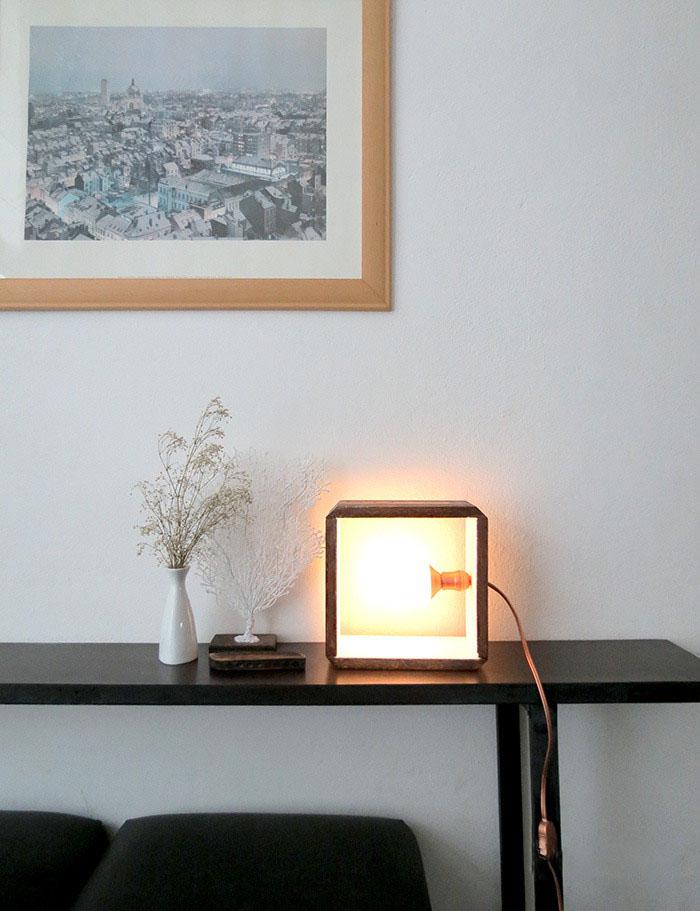

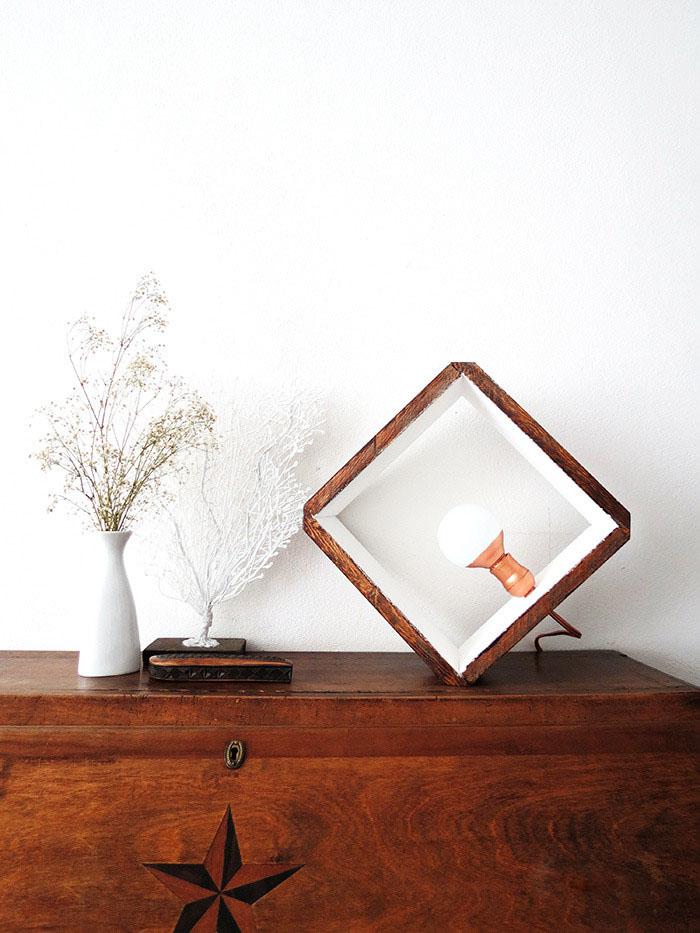
Use glue ( Resisto 850 ) to fix the square boards on the table. Stick just one side would looks better.
Do you happy with your handmade table lamp ? That’s it. Enjoy your new table lamp.
Materials:
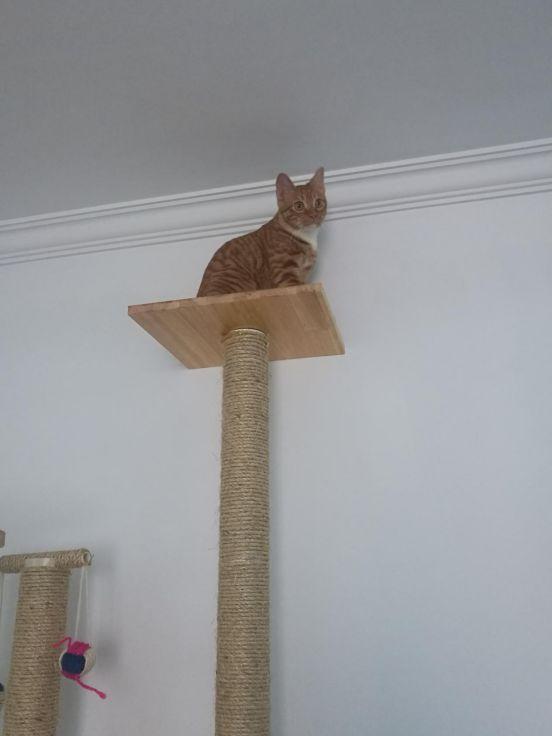
5. How to make a Cat Tree
I adopted a cat several days ago.As she grew up, she needed more space and activities, and it happened that I have a headache on how to deal with a bunch of accessories left under my house renovation. An inspiration suddenly ran into my mind why not make a cat tree for her ?So here we are!
Step 1: Step 1 Prepare work


First of all, you should make a simple design on paper and make sure that your design is based on your space where you will place it and it’s necessary to consider your cat’s personality, my princess Fluffy(her lovely name) likes jump up and down, climb here and there, so I determined to build a tall cat tree with perches,a little privacy room and hemp pillar stands.
I drew a really very simple design sketch,emm…well okay , I’m really not good at drawing. And then I list all the materials and tools I have and what I should to buy. Here is my checklist of stuff may be helps, if you want to have a try too.
- Plywood or Particle Boad (min:2″x4″x8″)
- 50 ft Hemp Rope
- PVC pipes
- Varnish
- some screws
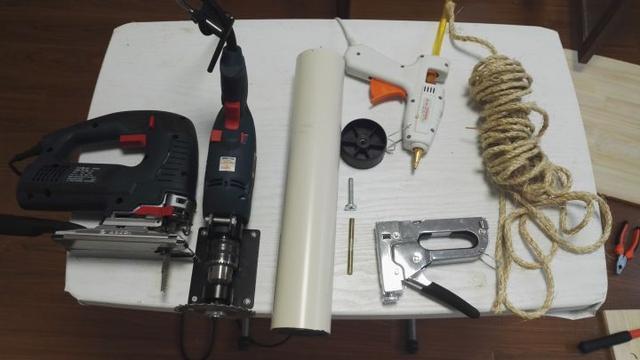
- Tools:Jigsaw, hand drill, glue gun, nail gun, hole opener
- Other accessories: toy balls, trash cans, glue sticks, wood wax oil, nails, etc.
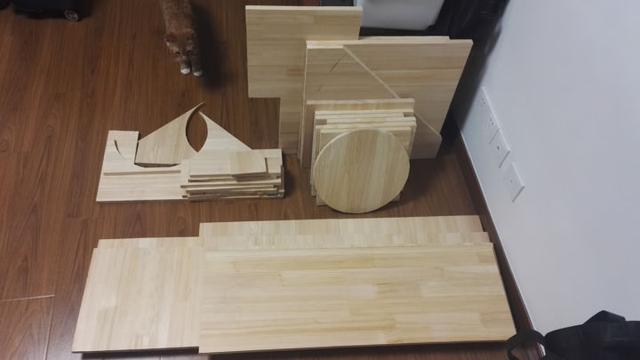
Step 2: Step 2 Cut all materials to size and painted with varnish

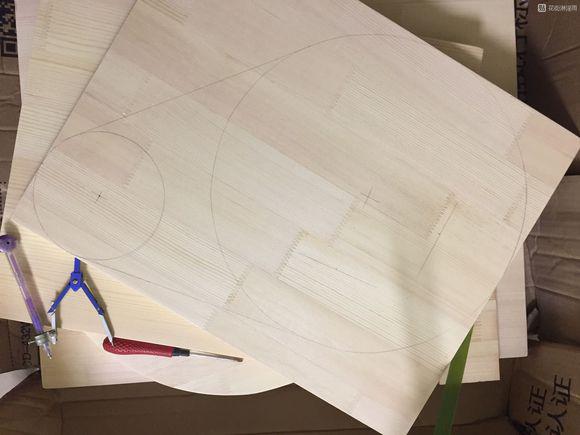


Cut all the boards into sizes and shapes that you designed with the jigsaw .Drill the pattern of the kitten’s claws with a puncher and jigsaw ,this is the most strenuous step in the entire process,you need more patience to do it.
Then polished with sandpaper .
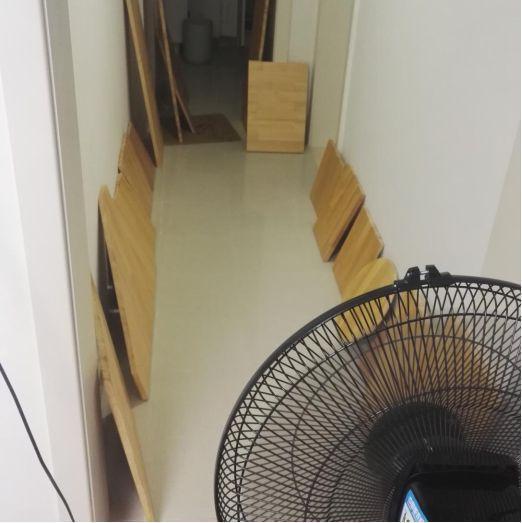
Varnished the board and dry them ,I varnished
three times and be proved later that that’s really neccesary ,the surface is smooth and beautiful ,easy to clean and waterproof.
Step 3: Step 3 Cut the pipes into sizes and wrapped with hemp rope

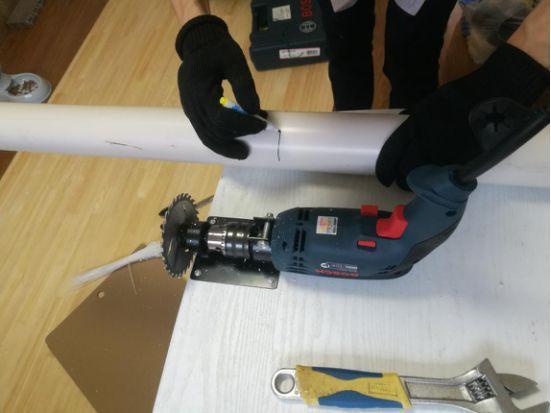

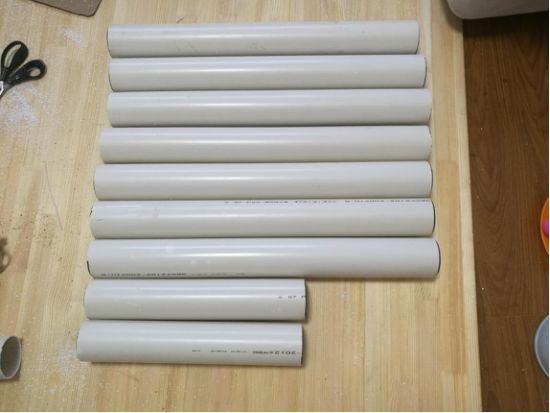


Finally, 7 columns (length 25″), 2 columns(length 16″),1 column (length 32″) were cut out.
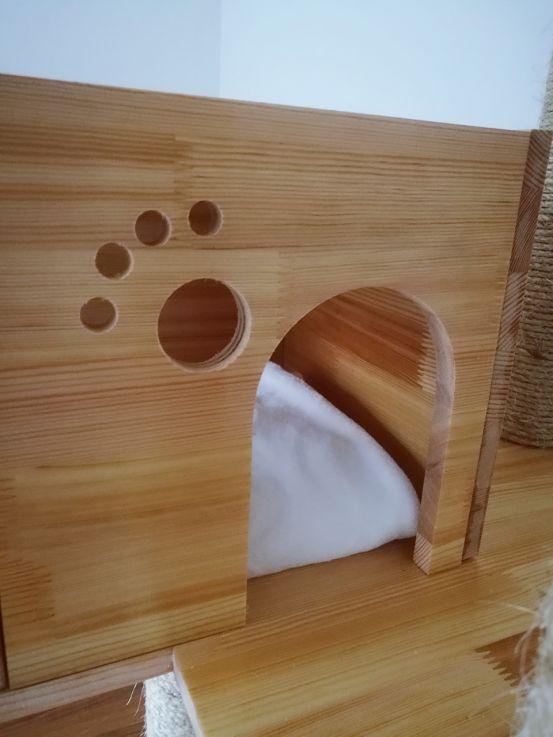
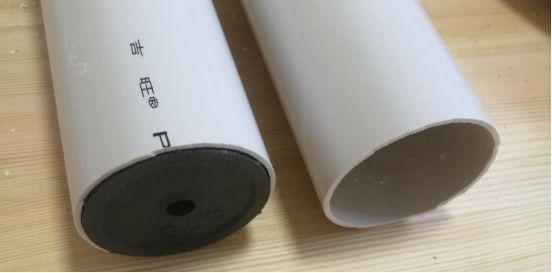
Seal the ends of the tube with a nail gun as the kitty condo’s climb stand.
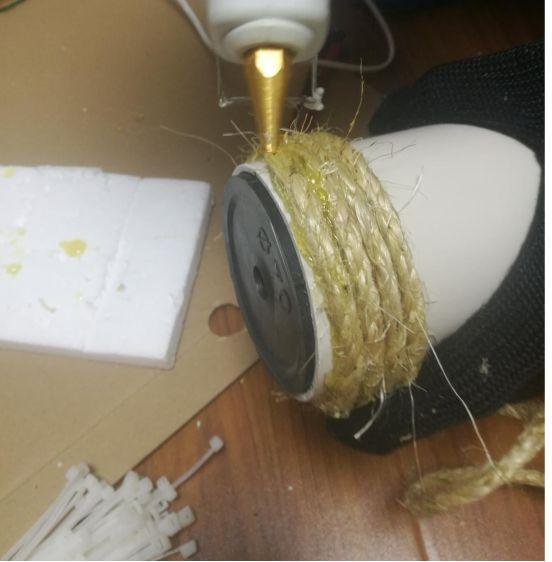
After that ,wrapped the hemp rope onto the stands with a glue gun helps to make sure the rope is firmly attached to the column, to help prevent them been ruined by your kitty’s paw.
Step 4: Step 4 Make the cat roll perches

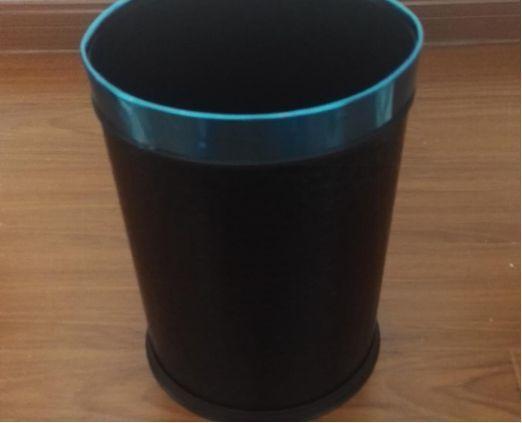

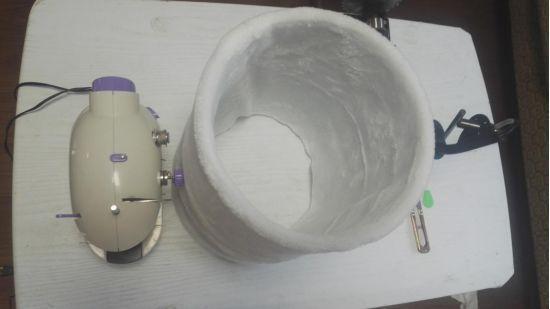
I saw off the bottom of an abandoned trash can, and then sewed a flannel cloth to make it warm and soft .
Praise my inspiration on your knees ,humanbeings !hahaha…
Step 5:Step 5 Assemble it !


Finally, the last step, very simple, use screws to assemble these parts!
Now,Please ,enjoy your time ,your majesty .